RBAC - Role-Based Access Control
Configure role-based permissions to control who can access and manage resources within your workspace.
Overview
RBAC (Role-Based Access Control) allows you to define custom roles with specific permissions, providing fine-grained control over workspace access.
Location: Access RBAC from Workspaces > {workspace-name} > Roles
URL:
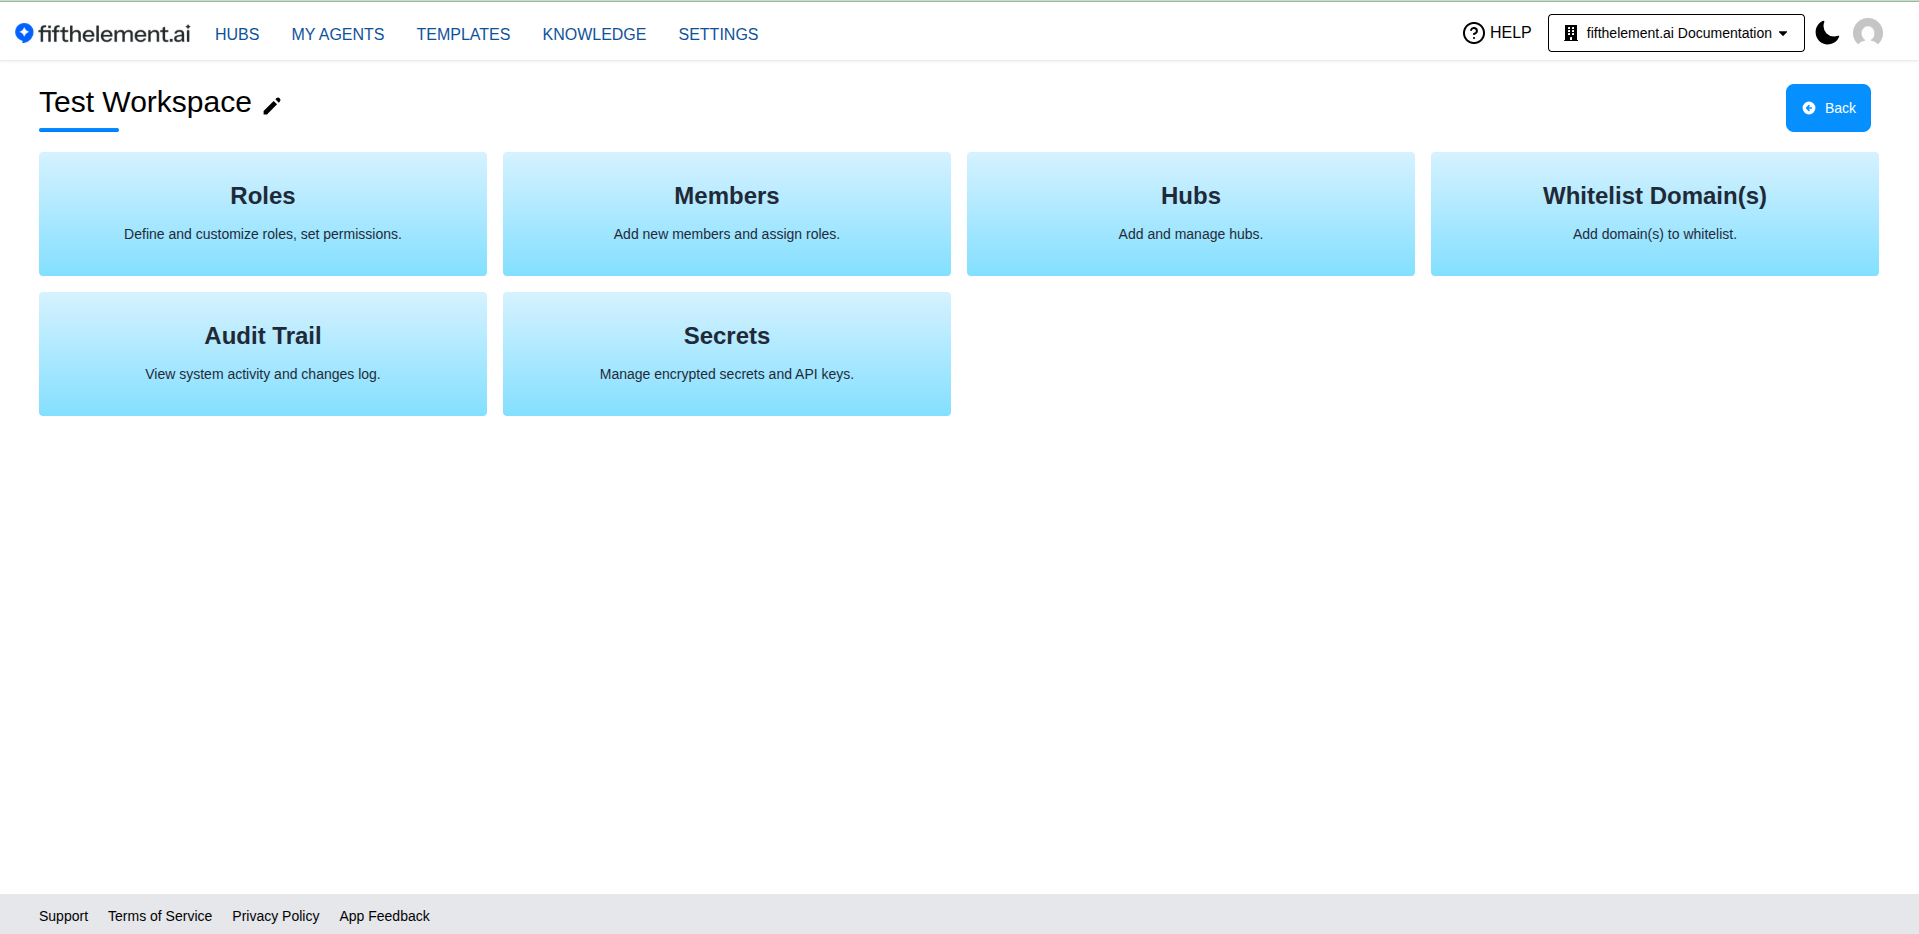
The workspace dashboard provides access to the following management sections (availability depends on your role):
| Section | Description |
|---|---|
| Roles | Define and customize roles, set permissions |
| Members | Add new members and assign roles |
| Hubs | Add and manage hubs |
| Whitelist Domain(s) | Add domain(s) to whitelist for access control |
| Audit Trail | View system activity and changes log |
| Secrets | Manage encrypted secrets and API keys (referenced via {{SECRETS.KEY}} syntax in credentials and tools) |
Accessing RBAC Settings
Step 1: Navigate to Your Workspace
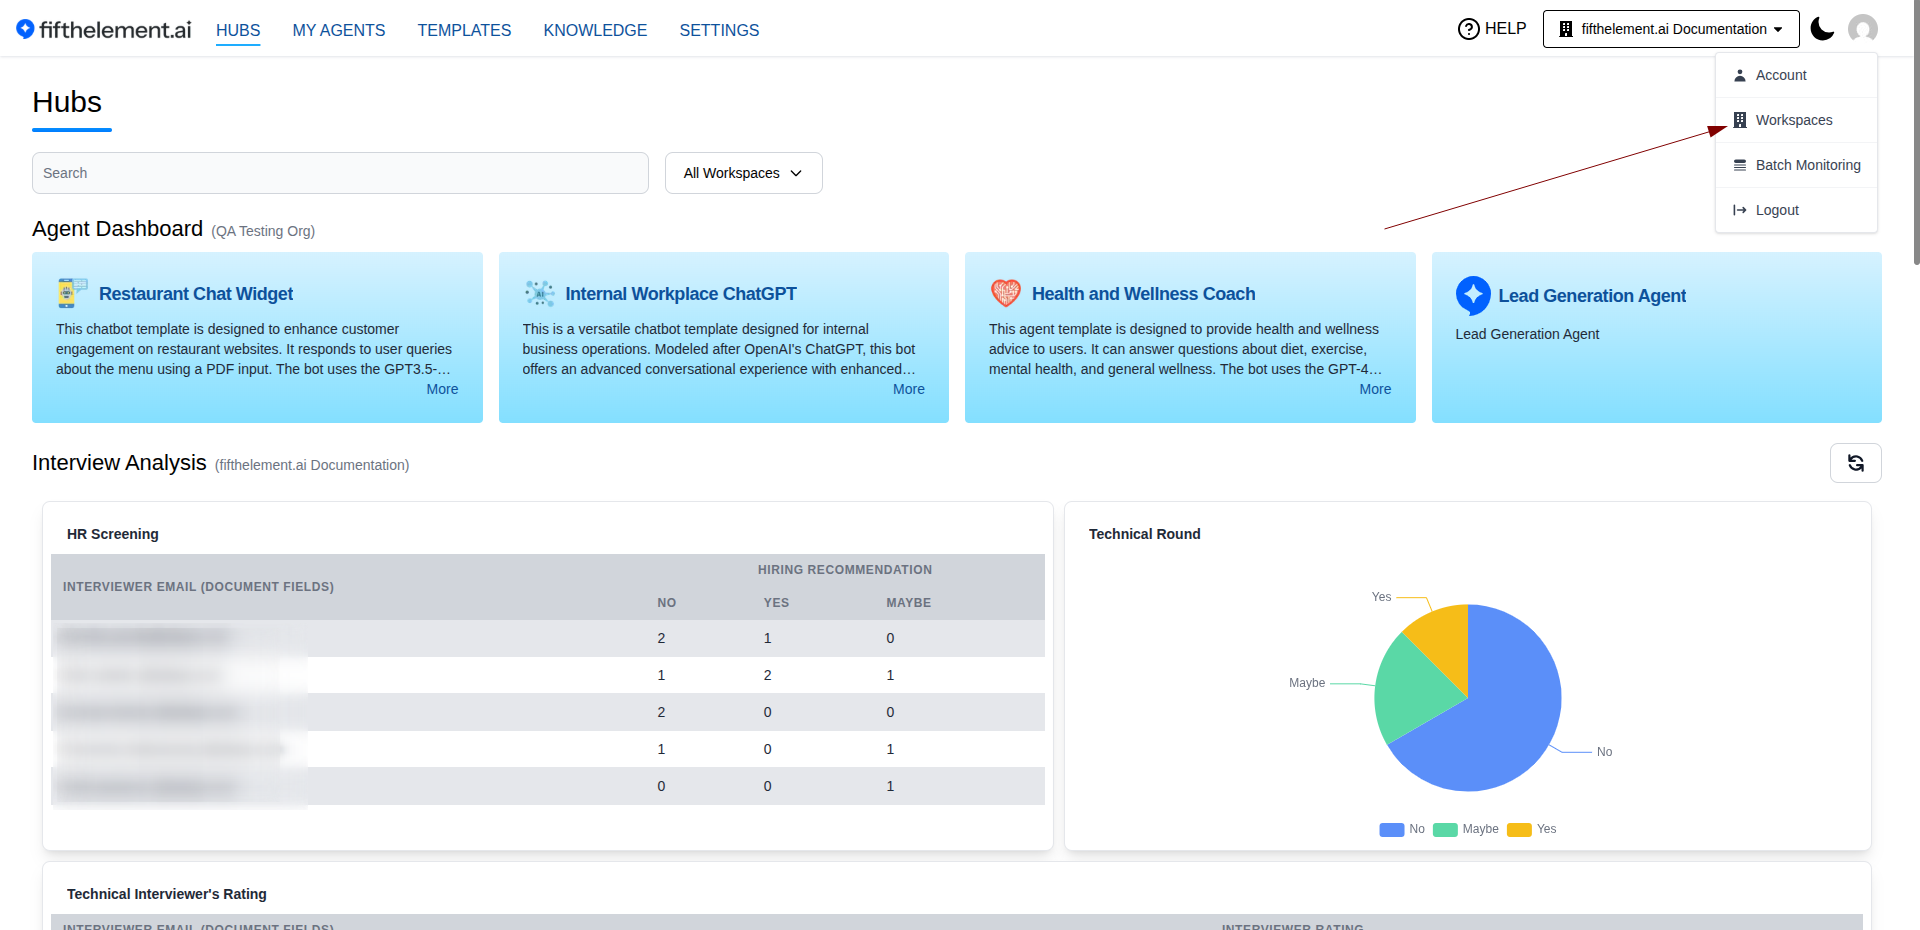
- Click the Account menu in the top-right corner
- Select Workspaces from the dropdown menu
- You'll see all workspaces you have access to, with your role and Enable/Disable status
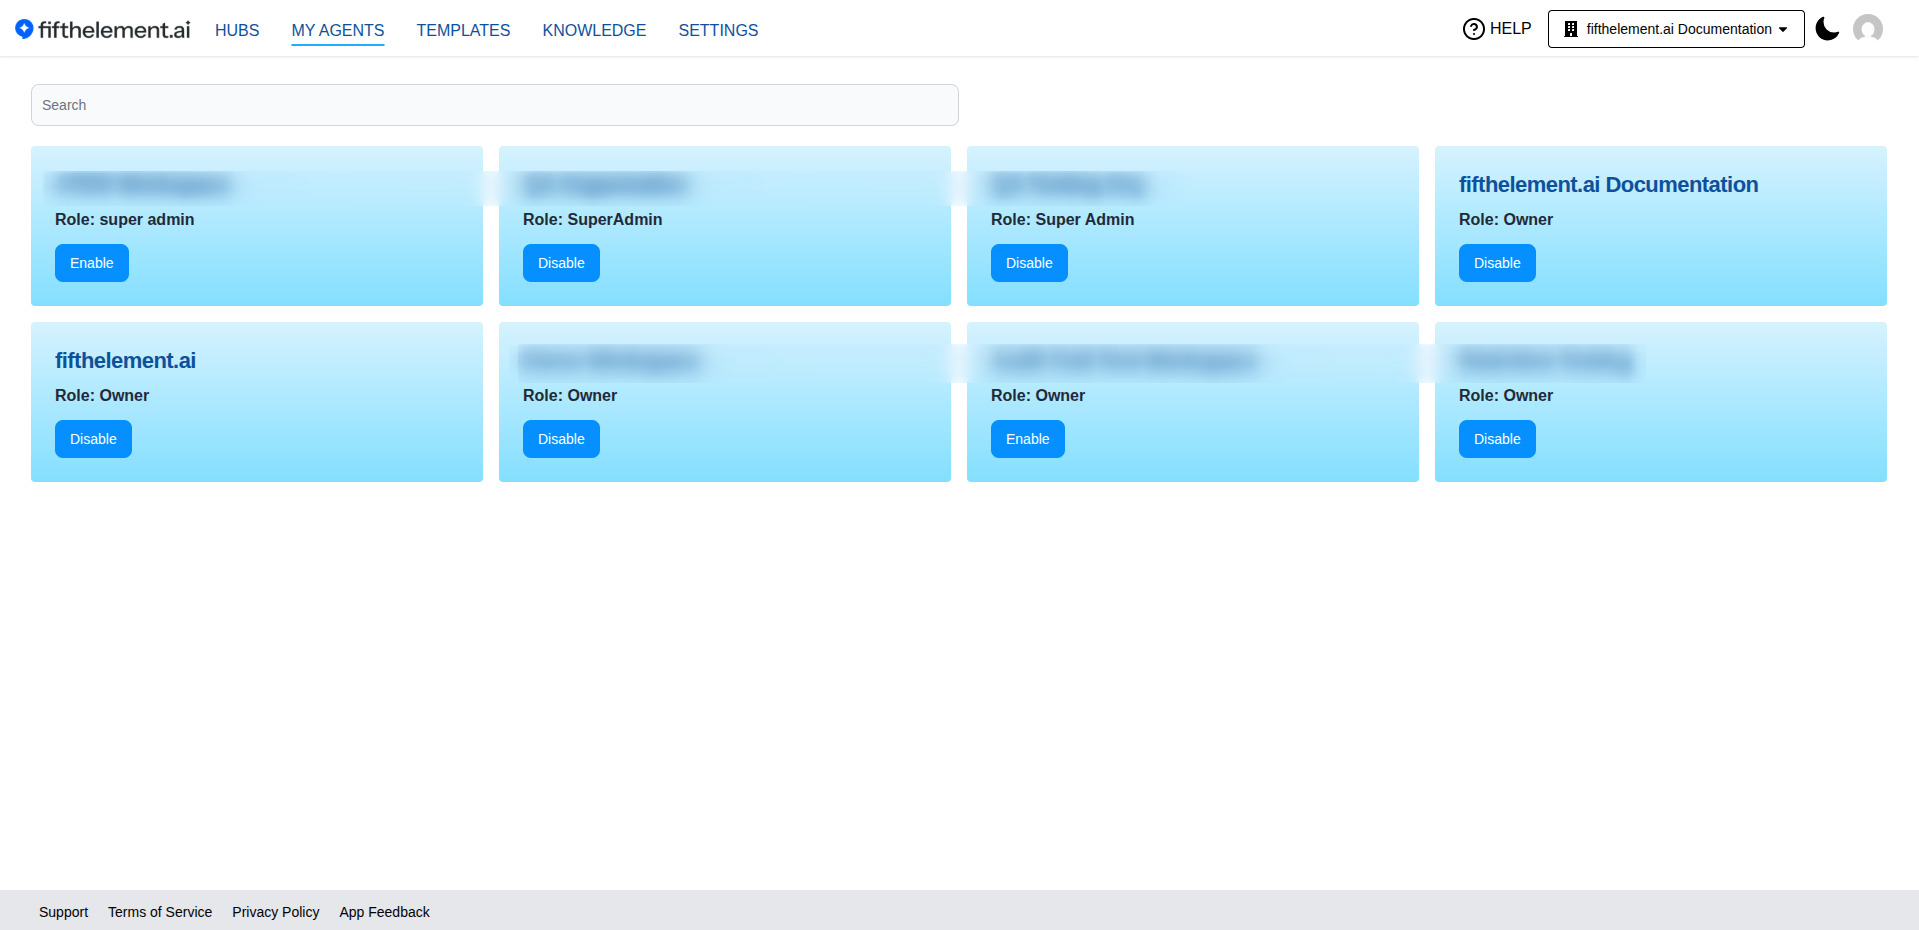
- Click Open on the workspace you want to configure
- You'll be taken to the workspace dashboard
Step 2: Open Roles Management
- On the workspace dashboard, locate the Roles card
- Click on the Roles card
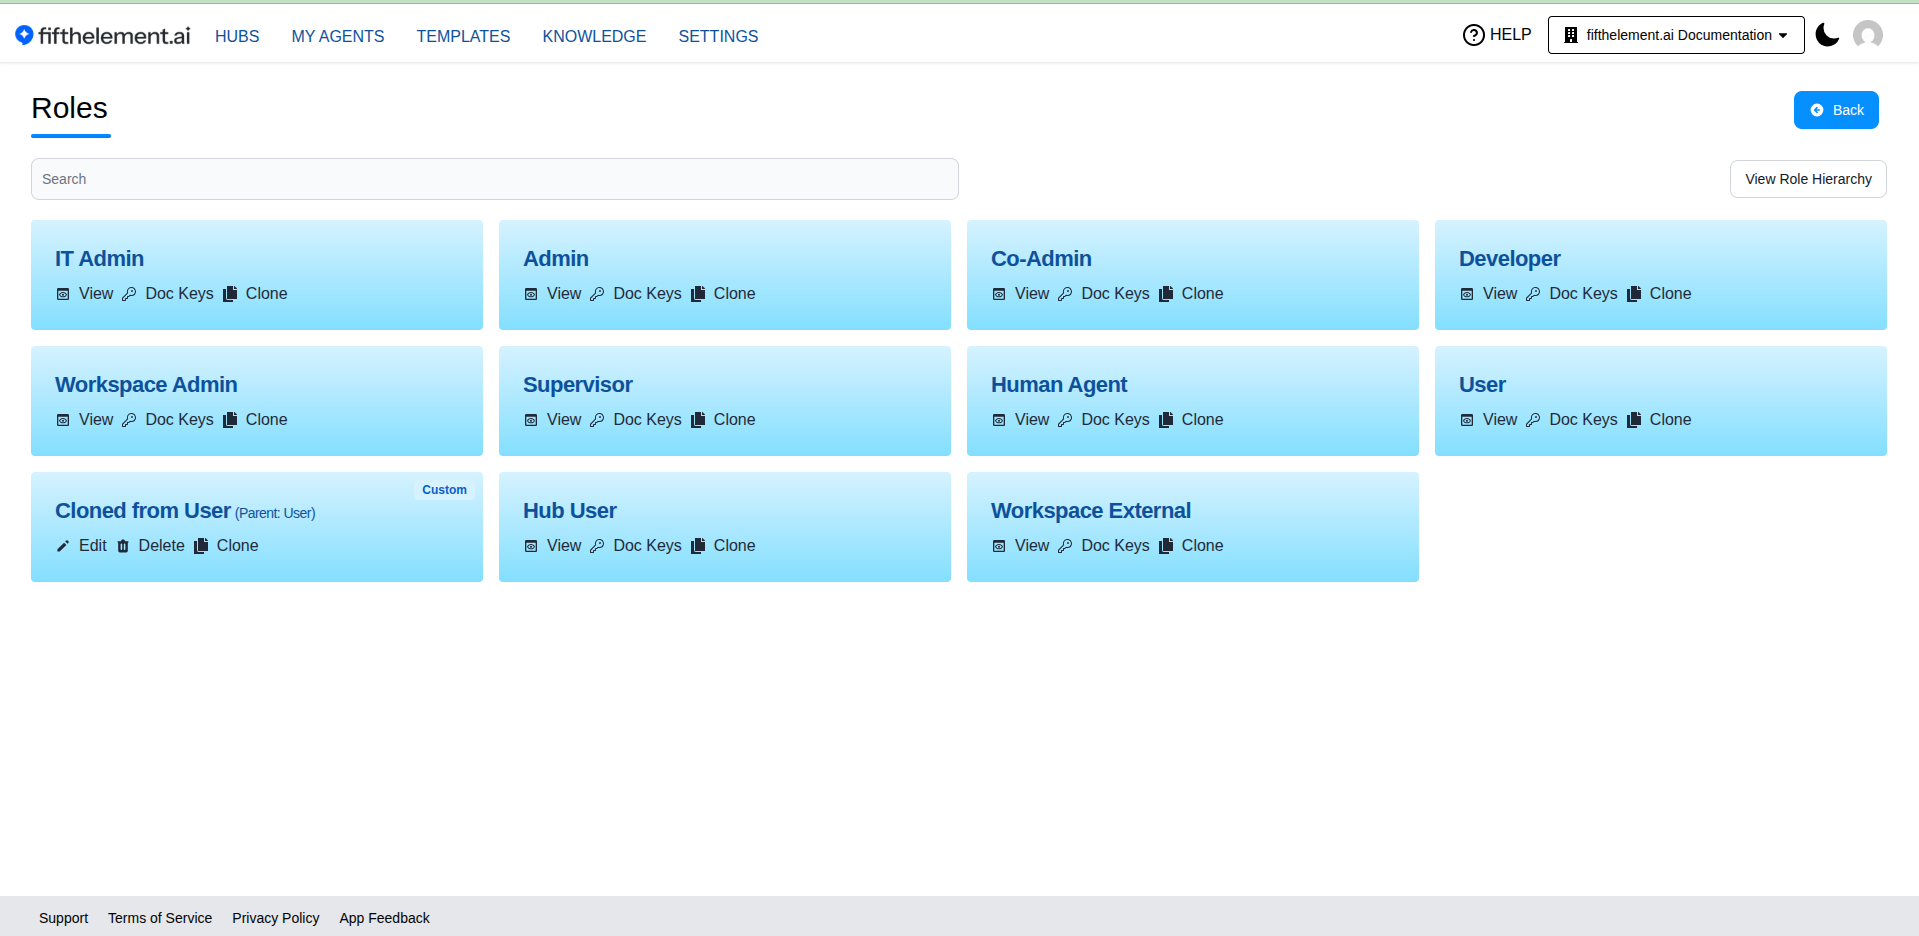
- You'll see a list of all roles in this workspace
Default Roles
Every workspace comes with the following built-in (seeded) roles:
| Role | Description |
|---|---|
| IT Admin | Full platform administration access |
| Admin | Workspace administration permissions; inspect the action matrix and scope for the exact grants |
| Co-Admin | Elevated workspace access, similar to Admin |
| Developer | Agent development and configuration access |
| Workspace Admin | Workspace-level administration |
| Supervisor | Monitor conversations, flag management, and oversight |
| Human Agent | Handle live conversations and human handover |
| User | Standard user access to agents and knowledge |
| Hub User | Access to hub-published agents |
| Workspace External | Limited access for external collaborators |
Role Actions
Seeded roles support the following actions:
- View — View the role's permission configuration
- Document Keys — Manage document access keys for the role
- Clone — Create a custom role based on this role
Custom Roles
Only cloned (custom) roles can be Edited or Deleted. Seeded roles cannot be modified — clone them first to customize permissions. Custom roles display a "Custom" badge and show their parent role.
Use Case: Stakeholders, auditors, external consultants
Managing Roles
Viewing a Role
- In the Roles list, click View on any role
- See all permissions assigned to that role
- Review the Agents, Knowledge Bases and Document Keys in Scope.
Editing a Role
- Click Edit on the role you want to modify
- Adjust permissions using the permission matrix
- Click Save to apply changes
Cannot Edit Default Roles
System roles such as Admin and User cannot be edited. Clone them to create custom roles.
Cloning a Role
Purpose: Create a custom role based on an existing one
Steps: 1. Click Clone on the role you want to copy 2. Confirm creation of an editable copy. 3. Open Edit on the copy, set its Name, and review scope and permissions. 4. Save the changes.
Example:
Clone a suitable role → "Content Editor"
Permissions:
- Can edit agents: ✅
- Can delete agents: ❌ (removed)
- Can upload knowledge: ✅
- Can invite members: ❌
Creating a Custom Role from Scratch
The current Roles page creates custom roles through Clone. Start with an appropriate existing role, confirm creation of its editable copy, then edit that custom role. Review inherited permissions before assigning members.
Deleting a Role
- Click Delete on the custom role
- Confirm deletion
Members Must Be Reassigned
Before deleting a role, ensure all members using that role are reassigned to another role. Otherwise, they'll lose workspace access.
Permission Matrix
Open View for a system role or Edit for a custom role. Review Scope for Agents, Knowledge Bases and Document Keys. Use Search permissions to find a capability and Granted / All to filter the view. The legend distinguishes granted, not granted and not applicable; an empty cell means the action does not exist for that item.
Agent Permissions
The Agent area includes General Create/Read/Update/Delete permissions and builder capabilities such as Brain, Tools & Artifacts, Knowledge Bases, Voice, processors and Documentation. Conversation and Report capabilities are listed separately within this area. Check the actual role instead of assuming access from its name.
Knowledge Permissions
Under Settings > Knowledge Base, review resource permissions and Document capabilities, including Upload, Delete, Update Locks All and Manage Scheduler. Knowledge Base scope and document keys are shown in Scope above the matrix.
Workspace Management
The Workspace area includes Members, Roles, Hubs, Whitelist Domain(s), Audit Trail and Secrets. View Last Login is a Members capability with a Read prerequisite. Additional capabilities show their prerequisite in the row label.
Hub Permissions
Workspace > Hubs provides Create, Read, Update and Delete, plus Report capabilities. Search Hubs to see the current role's grants and report prerequisites.
Custom Role Examples
Example 1: Content Manager
Use Case: Team member who manages knowledge but doesn't create agents
Permissions: - ✅ View all agents (read-only) - ✅ Upload documents - ✅ Edit documents - ✅ Create repositories - ❌ Create/edit agents - ❌ Invite members
How to Create: 1. Clone a suitable existing role 2. Name it "Content Manager" 3. Remove agent creation/editing permissions 4. Keep all knowledge permissions
Example 2: Agent Developer
Use Case: Developer who builds agents but doesn't manage content
Permissions: - ✅ Create and edit agents - ✅ Deploy agents - ✅ View knowledge (read-only) - ❌ Upload or edit documents - ❌ Manage members or roles
How to Create: 1. Clone a suitable existing role 2. Name it "Agent Developer" 3. Remove knowledge upload/edit permissions 4. Keep all agent permissions
Example 3: Hub Manager
Use Case: Organizes agents into hubs but doesn't create agents
Permissions: - ✅ View all agents - ✅ Create and edit hubs - ✅ Assign agents to hubs - ❌ Create or edit agents - ❌ Manage workspace settings
How to Create: 1. Clone a suitable existing role 2. Name it "Hub Manager" 3. Remove agent creation/editing 4. Keep hub management permissions
Example 4: Analytics Viewer
Use Case: Stakeholder who needs to see metrics but not modify anything
Permissions: - ✅ View agents - ✅ View knowledge - ✅ View analytics - ✅ Export reports - ❌ Create, edit, or delete anything
How to Create: 1. Clone a suitable existing role 2. Name it "Analytics Viewer" 3. Add export permissions 4. Keep everything else read-only
Assigning Roles to Members
During Invitation
When inviting a new member: 1. Enter their email address 2. Select the role from the dropdown 3. Click Send Invite
For Existing Members
To change a member's role: 1. Navigate to Workspaces > {workspace} > Members 2. Find the member in the list 3. Click Edit or the role dropdown 4. Select the new role 5. Click Save
Best Practices
Security
Principle of Least Privilege
Always assign the minimum permissions needed for a user to perform their job. Review the source role and remove permissions that are not needed.
Limit Admin Access
Only assign Admin role to trusted team leads and workspace owners. Too many admins increase security risk.
Organization
Descriptive Role Names
Use clear, descriptive names for custom roles: - ✅ "Content Editor - Support Docs" - ✅ "Agent Developer - Sales Team" - ❌ "Custom Role 1" - ❌ "Role ABC"
Document Custom Roles
Add descriptions to custom roles explaining their purpose and typical users.
Maintenance
Regular Audits
Quarterly review: - Who has Admin access - Members with custom roles - Unused or outdated roles
Remove Inactive Members
Revoke workspace access for members who've left the team or project.
Common Scenarios
Scenario 1: Freelancer Access
Requirement: Give a freelancer temporary access to build agents
Solution: 1. Create custom role: "Freelancer - Agent Builder" 2. Permissions: - Can create and edit agents: ✅ - Can view knowledge: ✅ (read-only) - Cannot invite members: ❌ - Cannot delete agents: ❌ 3. Set expiration reminder for their access
Scenario 2: Cross-Team Collaboration
Requirement: Sales team needs read access to Support team's workspace
Solution: 1. Invite Sales team members to Support workspace 2. Assign a custom role with the required read permissions 3. They can see agents and knowledge but not modify
Scenario 3: Intern with Limited Access
Requirement: Intern can upload documents but cannot deploy agents
Solution: 1. Clone a suitable role → "Intern" 2. Permissions: - Upload documents: ✅ - Create agents: ✅ - Deploy agents: ❌ (removed) - Delete anything: ❌ (removed)
Scenario 4: Multi-Client Agency
Requirement: Each client manager manages only their client's agents
Solution: 1. Create separate workspaces per client 2. Assign client managers as "Admin" in their client's workspace 3. Grant access to another client’s workspace only when required, using an explicitly reviewed role and scope
Troubleshooting
Cannot Access Roles Settings
Issue: "Roles" card not visible or clicking does nothing
Solutions: - Confirm the selected workspace. - Ask an authorized administrator to inspect the role-management grants on your role. - Request only the permissions needed for the task.
Role Changes Not Applying
Issue: Updated permissions but member still has old access
Solutions: - Reopen the member record and verify the saved role assignment. - Refresh the affected page under the member’s account and reproduce the exact action. - If access still differs from the role matrix, record the role, resource and error for support; do not assume a fixed propagation time.
Cannot Delete Custom Role
Issue: Delete button is greyed out
Solutions: - Check if members are still assigned this role - Reassign all members to different roles first - Check whether the role is a read-only system role; use an editable custom role for custom grants.
Permission Denied Error
Issue: Member sees "Permission Denied" when trying to perform action
Solutions: - Verify their role has the required permission - Check workspace RBAC settings - Confirm they're in the correct workspace
Related Topics
- Workspaces Overview - Workspace management and organization
- Hubs - User Access - Hub-specific permissions
- Hubs - Creating Hubs - Admin role required
- Settings > SSO - Platform-wide authentication
- My Agents - Agent creation and management