Workspaces
Workspaces provide multi-tenant organization and access control for your fifthelement.ai platform.
Overview
A Workspace is an isolated environment where teams can collaborate on AI agents, manage knowledge bases, and control access through role-based permissions.
Key Features
- Multi-Tenant Isolation: Each workspace has its own agents, knowledge bases, and data
- Role-Based Access Control (RBAC): Define custom roles and permissions
- Team Collaboration: Invite team members and assign roles
- Resource Management: Organize agents and knowledge by workspace
Workspace Structure
Workspace
├── Agents (all agents in this workspace)
├── Knowledge Bases (repositories specific to this workspace)
├── Roles (RBAC configuration)
├── Members (users with access)
└── Settings (workspace-specific configuration)
Accessing Workspaces
Navigation: Use the top-right workspace selector to switch the active workspace. To manage one, open Account menu > Workspaces and click its Open button.
URL Format:
Workspace Management
-
Roles & Permissions
Configure role-based access control for your workspace.
-
Members
Invite users and manage team access.
-
Settings
Configure workspace-specific settings.
-
Hubs
Organize agents into categorized hubs.
Managing Members
Adding Members
- Navigate to Workspaces > {your-workspace} > Members
- Click Invite.
- Enter the email address in To, then press Enter.
- Select a workspace role. Add Document Keys and Hubs Access assignments as needed.
- Click Send Invite.
Member Roles
Choose from the seeded and custom roles available in your workspace. See RBAC & Roles for the role list and permissions.
Members Page Columns
The Members page shows the following columns. Visibility of the Last Active column is restricted to admins and workspace owners.
| Column | Description |
|---|---|
| Email / User Identifier | Member email address, or Service Account UUID for system identities |
| Role | Assigned RBAC role (seeded or custom) |
| Document Keys | Document access keys assigned to the member |
| Hubs | Hub assignments |
| Created At | When the member was invited / created |
| Last Active | Most recent activity timestamp. Members invited but never logged in show Never. Non-privileged members do not see this column |
| Action | Remove action where available; role, document-key and hub edits use their own column controls |
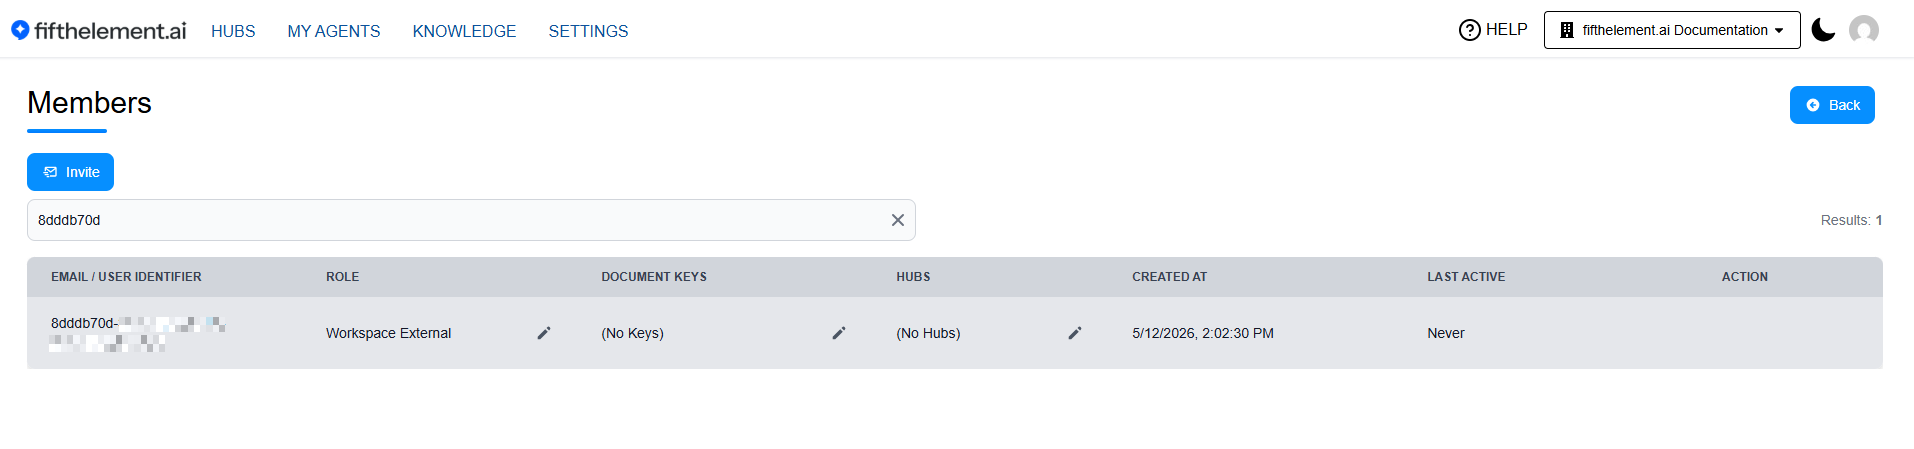
Members page showing the Last Active column — a Service Account that has never been used shows "Never"
Service Accounts on the Members Page
Service Accounts paired with Workspace API Keys also appear on the Members page (searchable by Service Account UUID) with the Workspace External role assigned by default. Admins can edit the role assignment, document keys, or hub assignments inline.
Workspace Settings
Open the workspace management page to find its administrative areas:
| Area | Purpose |
|---|---|
| Members | Review roles, member document keys and Hub assignments. |
| Roles | Inspect permission groups and resource scope. |
| Hubs | Manage grouped agent and Knowledge Base access. |
| Secrets | Manage workspace secrets; avoid exposing values in shared evidence. |
| Whitelist Domains | Review domain-based joining configuration. |
| Audit Trail | Inspect the available audit filters and export controls. |
The actions available depend on your permissions. Review conversation/message retention under Settings > Data Purge; do not infer a retention policy from an example workspace.
Best Practices
Workspace Organization
- Create separate workspaces for different teams, projects, or clients
- Use descriptive workspace names (e.g., "Customer Support", "Sales Team", "Product Demo")
- Set up RBAC early to establish clear access boundaries
Access Control
- Follow principle of least privilege
- Use custom roles for specific use cases
- Regularly audit workspace members and their roles
Resource Naming
- Use consistent naming conventions across agents and knowledge bases
- Include workspace context in agent names if sharing across teams
- Document agent purposes in descriptions
Common Scenarios
Scenario 1: Multi-Client Agency
Create separate workspaces for each client:
Workspace: Client-A
├── Agents: Client A Support Bot, Client A Sales Bot
└── Knowledge: Client A Documentation

Workspace: Client-B
├── Agents: Client B Support Bot
└── Knowledge: Client B Documentation
Benefits: - Complete data isolation - Client-specific access control - Workspace-specific organization of resources and members
Scenario 2: Department-Based
Organize by internal departments:
Workspace: Customer-Support
├── Agents: Tier 1 Support, Tier 2 Technical
└── Members: Support team only

Workspace: Sales
├── Agents: Lead Qualifier, Demo Scheduler
└── Members: Sales team only
Benefits: - Clear ownership - Department-specific permissions - Targeted analytics
Switching Workspaces
From the UI: 1. Click the workspace selector in the top-right corner 2. Select the workspace you want to switch to 3. The page reloads with the new workspace context
URL-Based: Access a specific workspace directly:
Troubleshooting
Cannot See Workspace
Issue: Workspace not appearing in the selector
Solutions: - Verify you've been invited to the workspace - Check your email for the invitation - Contact workspace admin to verify your access
No Permission to Create Resources
Issue: Cannot create agents or upload knowledge
Solutions: - Check the current workspace and your assigned role. - Ask an authorized administrator to review the specific action permission and resource scope. - Request the minimum access required for the task.
Related Topics
- RBAC & Roles - Configure role-based permissions
- Hubs - Organize agents within workspaces
- Settings > SSO - Platform-wide authentication
- My Agents - Create and manage agents