DLP Policies
Configure Data Loss Prevention policies to detect, anonymize, and sanitize sensitive information in conversations.
Overview
DLP (Data Loss Prevention) policies protect sensitive data by identifying and anonymizing Personally Identifiable Information (PII) and other sensitive content in agent conversations. When a DLP policy is active, user messages are scanned and sensitive data is replaced before being processed by the agent.
Only one DLP policy can be active for a workspace at a time. The default is No DLP Policy (DLP disabled).
DLP Policies are managed under Settings > Security & Access > DLP Policies.
Managing DLP Policies
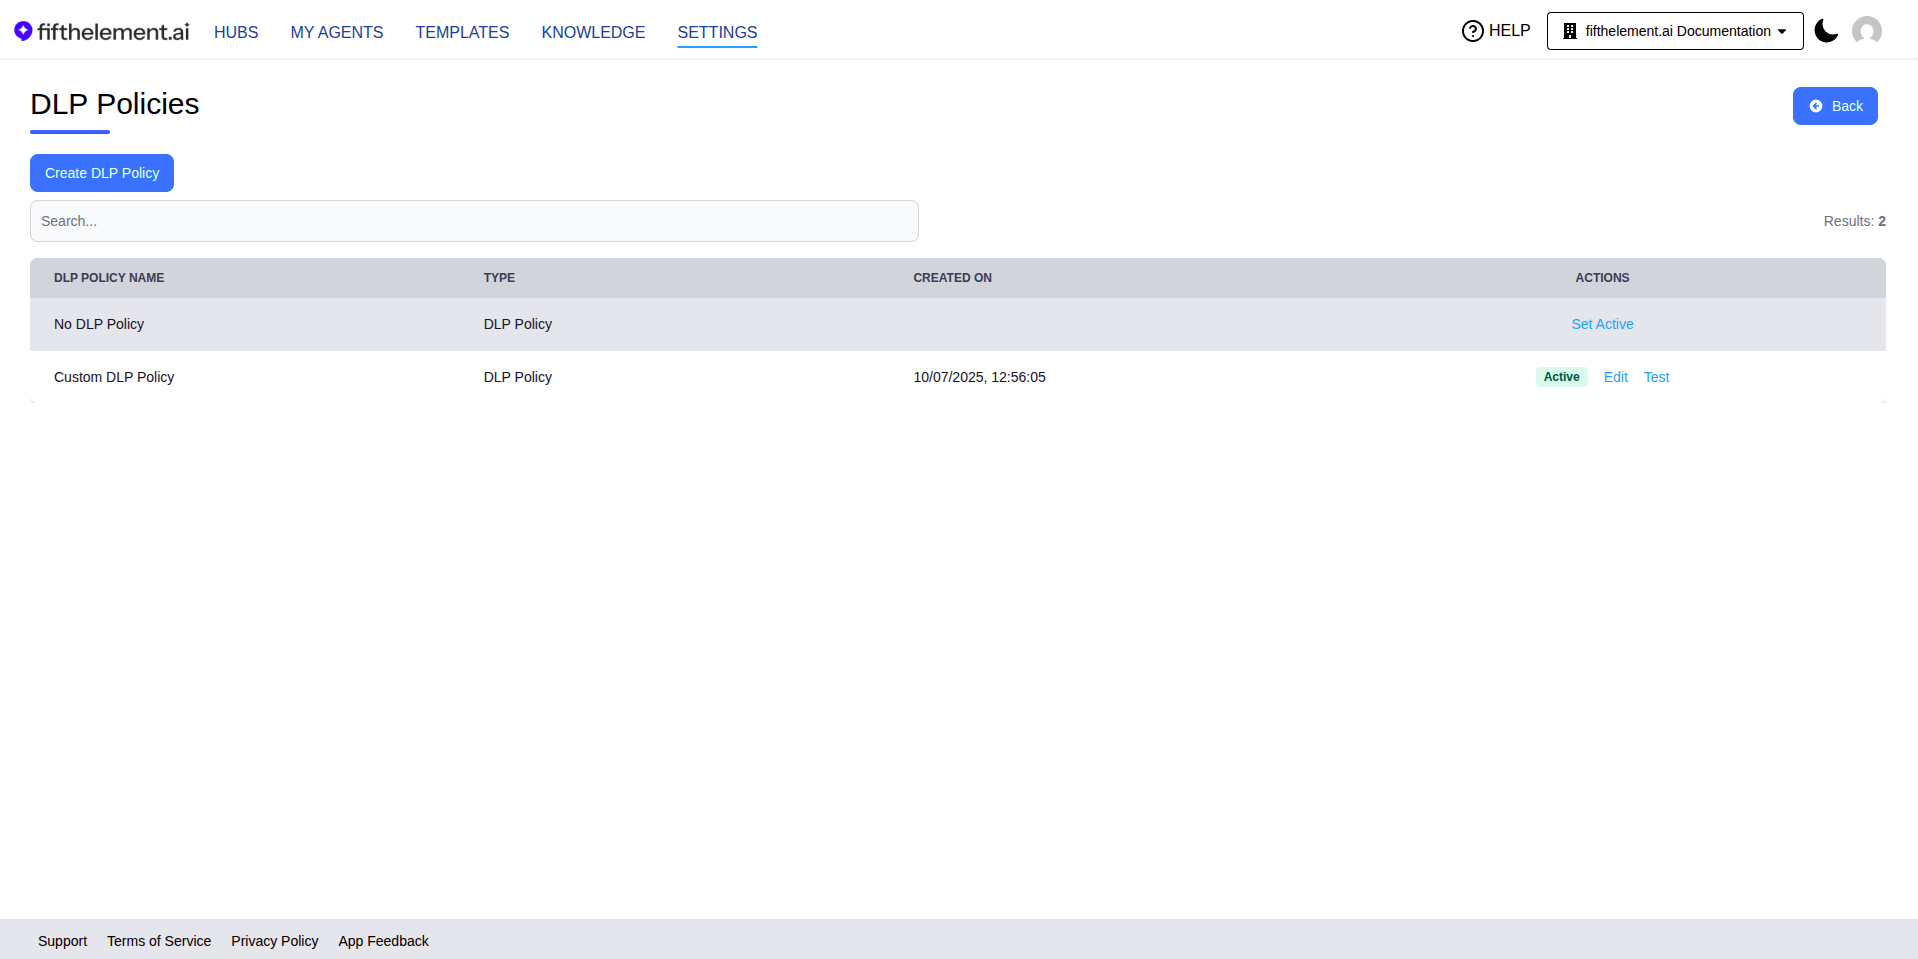
The DLP Policies page displays all configured policies:
| Column | Description |
|---|---|
| DLP Policy Name | Name of the policy |
| Type | Policy type (DLP Policy) |
| Created On | Date and time the policy was created |
| Actions | Set Active (for inactive policies), Active badge (for the current policy), Edit, More actions > Test, and Delete |
One Active Policy
Only one DLP policy can be active at a time. Click "Set Active" on a policy to make it the workspace's active policy. The previously active policy is automatically deactivated.
Creating a DLP Policy
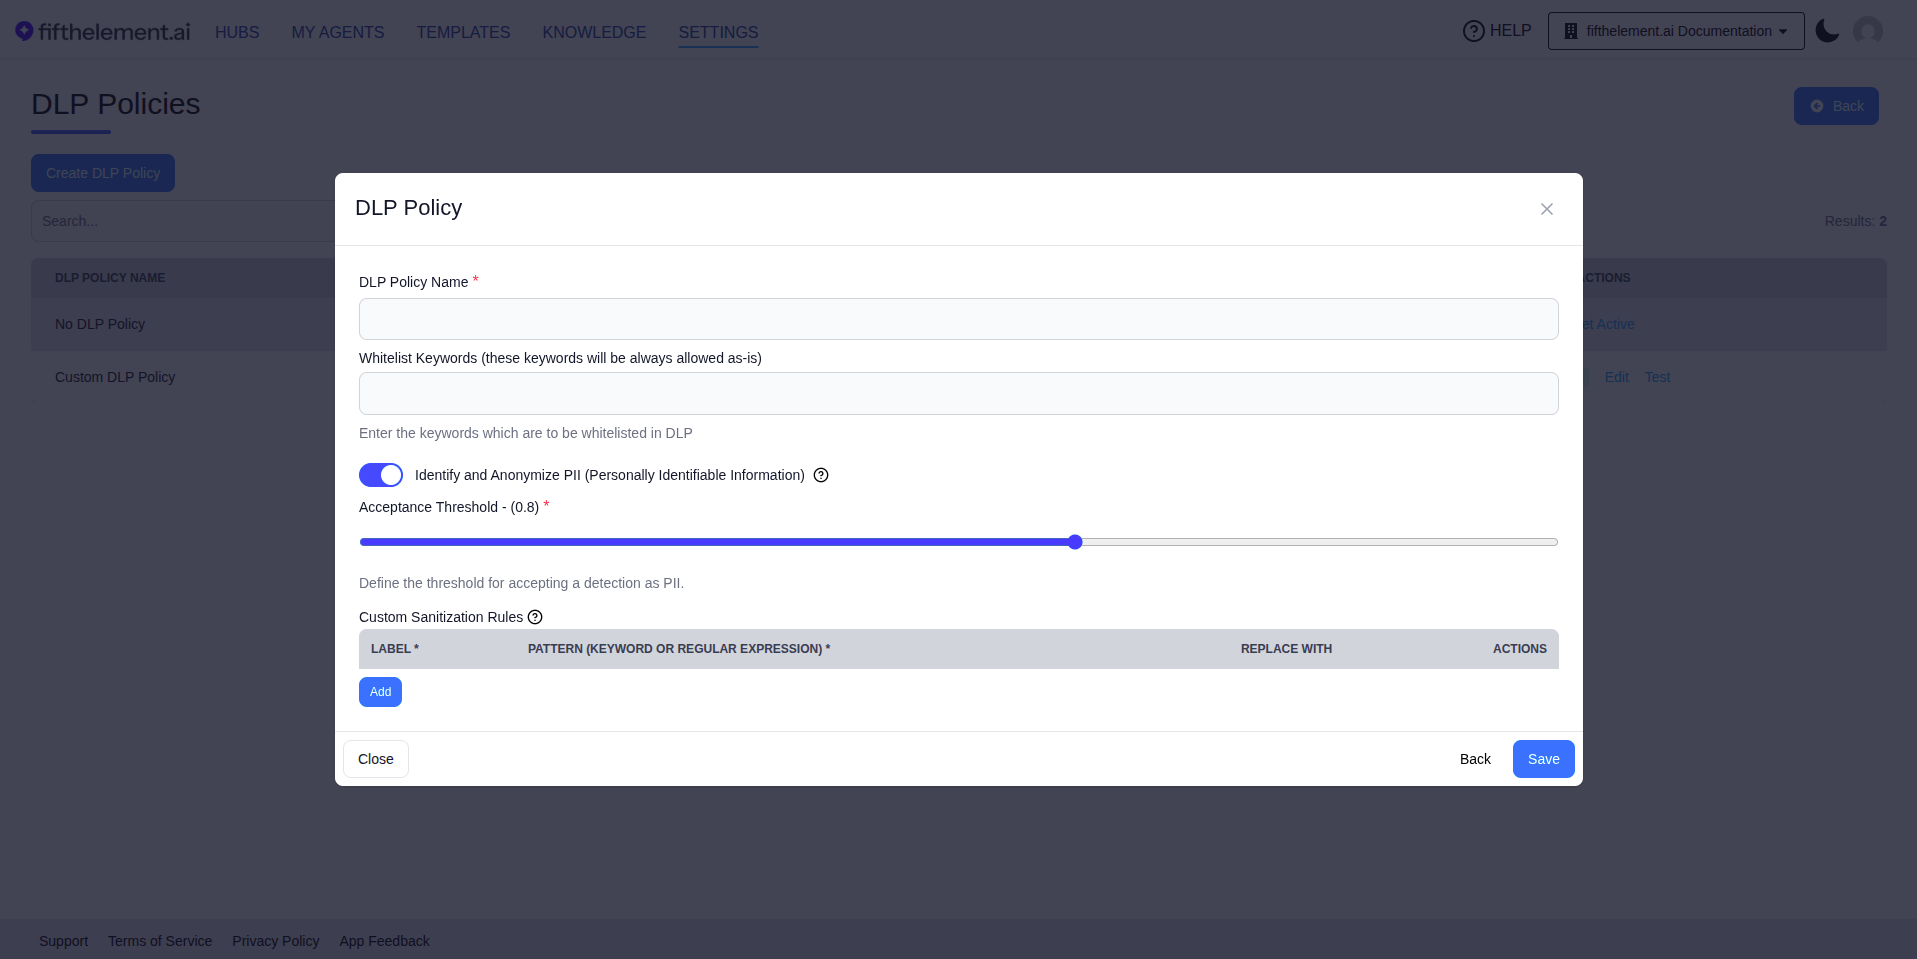
- Navigate to Settings > Security & Access > DLP Policies
- Click "Create DLP Policy"
- Configure the policy settings
- Click "Save"
Configuration Fields
| Field | Required | Description |
|---|---|---|
| DLP Policy Name | Yes | A descriptive name for the policy (e.g., "Custom DLP Policy") |
| Whitelist Keywords | No | Keywords that will always be allowed as-is and not anonymized, even if they match PII patterns |
| Identify and Anonymize PII | No | Toggle to enable automatic detection and anonymization of Personally Identifiable Information (names, phone numbers, emails, etc.) |
| Acceptance Threshold | Yes (when PII enabled) | Confidence threshold for accepting a detection as PII (0 to 1). Higher values require stronger confidence before anonymizing. Default: 0.8 |
Custom Sanitization Rules
Define custom patterns to detect and replace specific sensitive data beyond standard PII detection:
| Column | Description |
|---|---|
| Label | A descriptive name for the rule |
| Pattern (Keyword or Regular Expression) | The keyword or regex pattern to match |
| Replace With | The replacement text. Leave blank for automatic anonymization |
Click "Add" to create additional custom rules.
Testing a DLP Policy
Before activating a policy, you can test it to verify that sensitive data is correctly identified and anonymized.
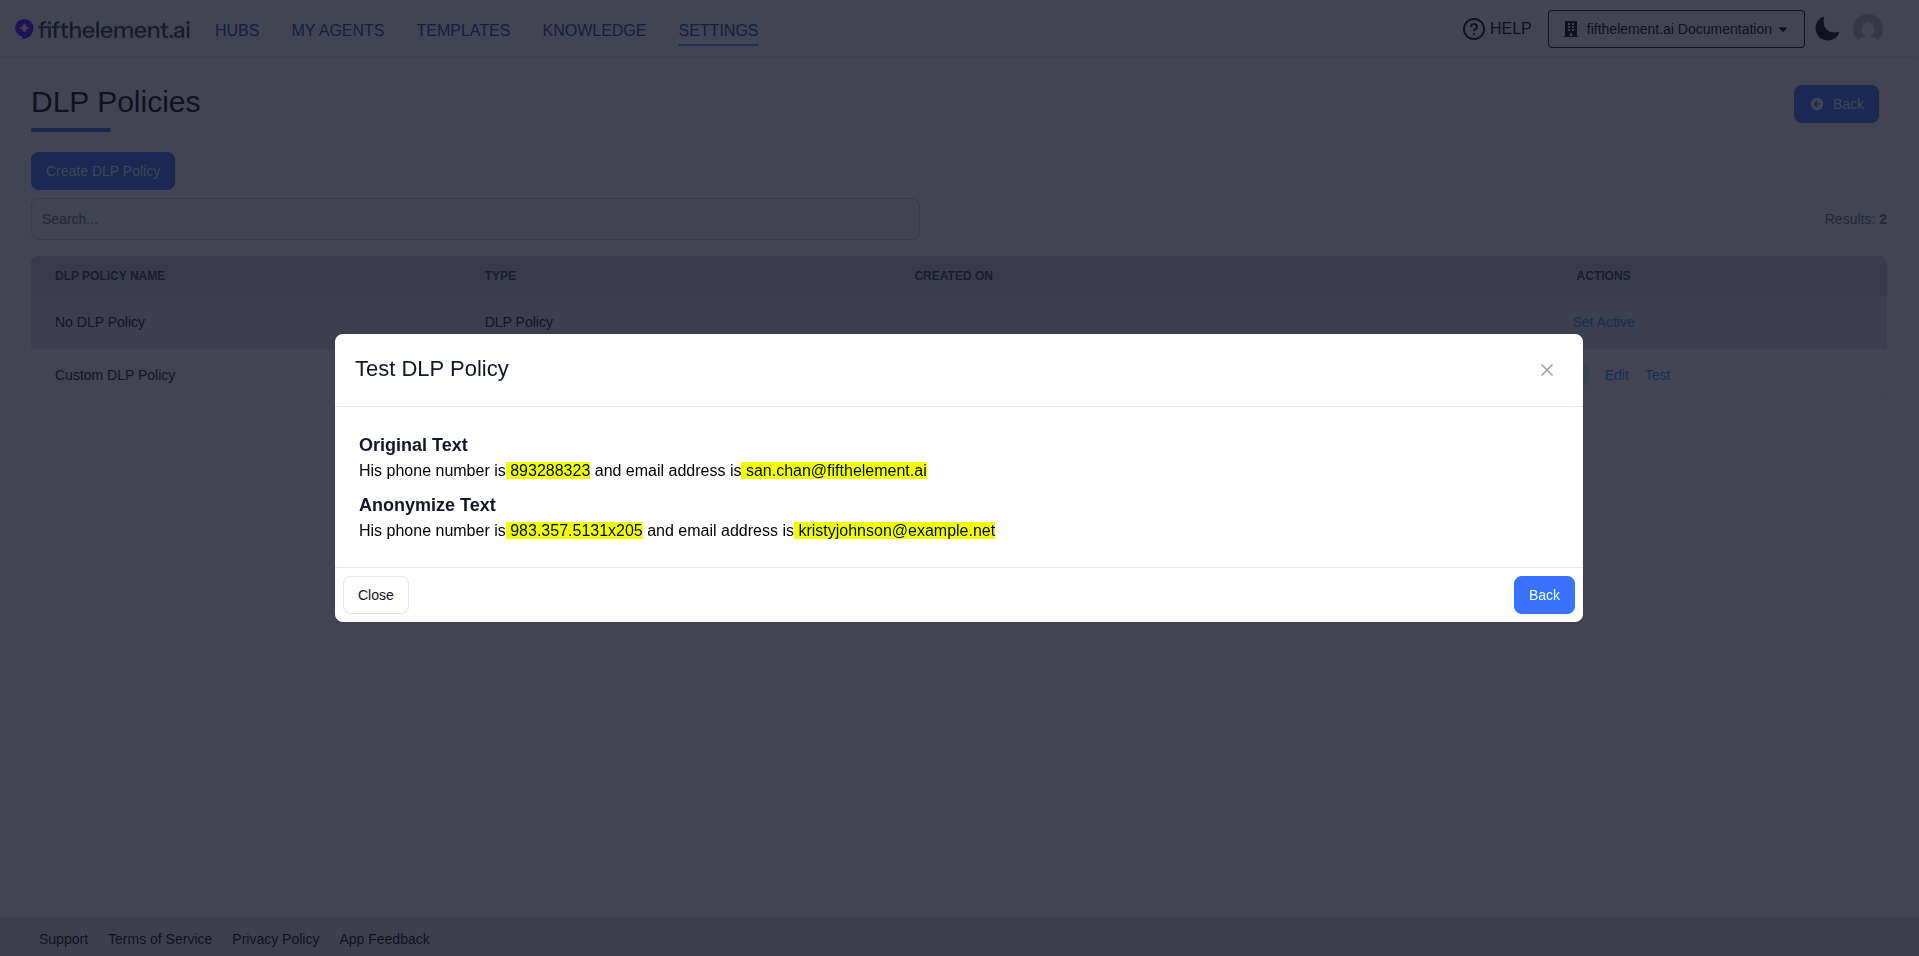
- Open More actions (the three-dot menu) for the policy and select Test.
- Enter synthetic sample text in Input. Do not use real personal or confidential information.
- Click Test and review the result before activating the policy.
Include examples that should be detected, whitelisted keywords, and ordinary text that should remain unchanged. Check your custom sanitization rules separately.
Activating a Policy
- Navigate to Settings > Security & Access > DLP Policies
- Click "Set Active" on the desired policy
- The policy immediately becomes the workspace's active DLP policy
To disable DLP, set "No DLP Policy" as the active policy.
DLP Policy Permissions
DLP policy management is controlled through RBAC with the following permissions:
- Create — Create new DLP policies
- Read — View existing policies
- Update — Edit policy configuration
- Delete — Remove policies
Configure these under Workspaces > Roles > Settings > DLP Policies. See RBAC & Roles for details.
Related Topics
- Credentials — Manage provider API credentials
- API Keys — Platform API keys
- RBAC & Roles — Configure DLP permissions per role
- Back to Settings