User Access & RBAC
Configure role-based access control for hubs and manage user permissions.
Access Control Overview
Hubs use a flexible access control system that combines role-based and user-based assignments. Users can access a hub if:
- Their workspace role is assigned to the hub, OR
- They are directly assigned to the hub as an individual user
Both conditions are evaluated independently—meeting either condition grants access.
Role-Based Access Control (RBAC)
Hub Creation Permission
Control who can create hubs within your workspace.
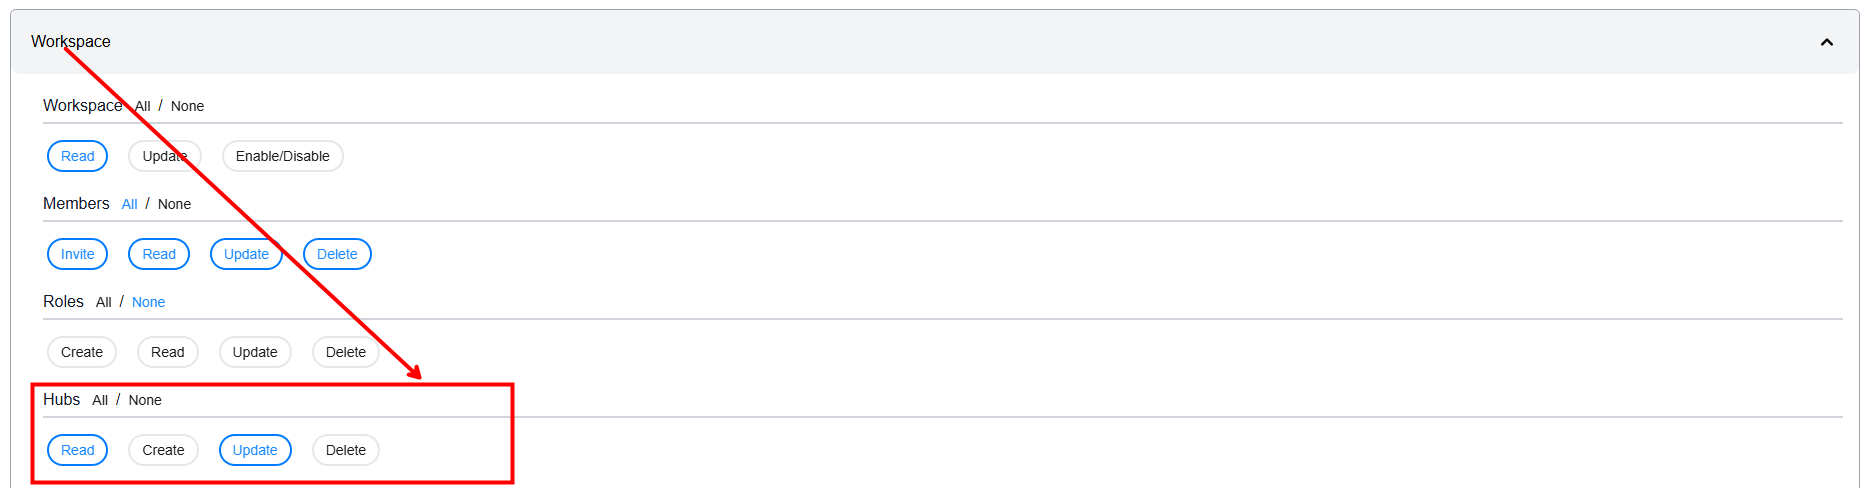
Admin role: Workspace > Hubs Create, Read, Update and Delete permissions.
Default Permissions
The seeded Admin role grants Hubs Create, Read, Update and Delete. Review each role's matrix for its actual permissions.
Granting Hub Creation Permission
- Open Account menu > Workspaces, click Open for the workspace, then choose Roles.
- Edit a custom role, or clone an appropriate system role to create an editable copy.
- Search permissions for Hubs.
- Review the Create permission in Workspace > Hubs and enable it if appropriate.
- Save the role configuration.
Hub Access via Roles
When you assign a role to a hub, all users with that role automatically gain access.
Benefits of Role-Based Assignment
- Scalability: New users with the role automatically get access
- Consistency: Ensures predictable access patterns
- Easier Management: Change role assignments in one place
- Audit Trail: Clear understanding of who has access and why
Best Practices
- Assign hubs to roles whenever possible
- Use direct user assignment only for exceptions
- Document why certain roles have access to specific hubs
- Review role assignments quarterly
Assigning Hubs to Users
During User Invitation
You can assign hubs when inviting new users to your workspace.
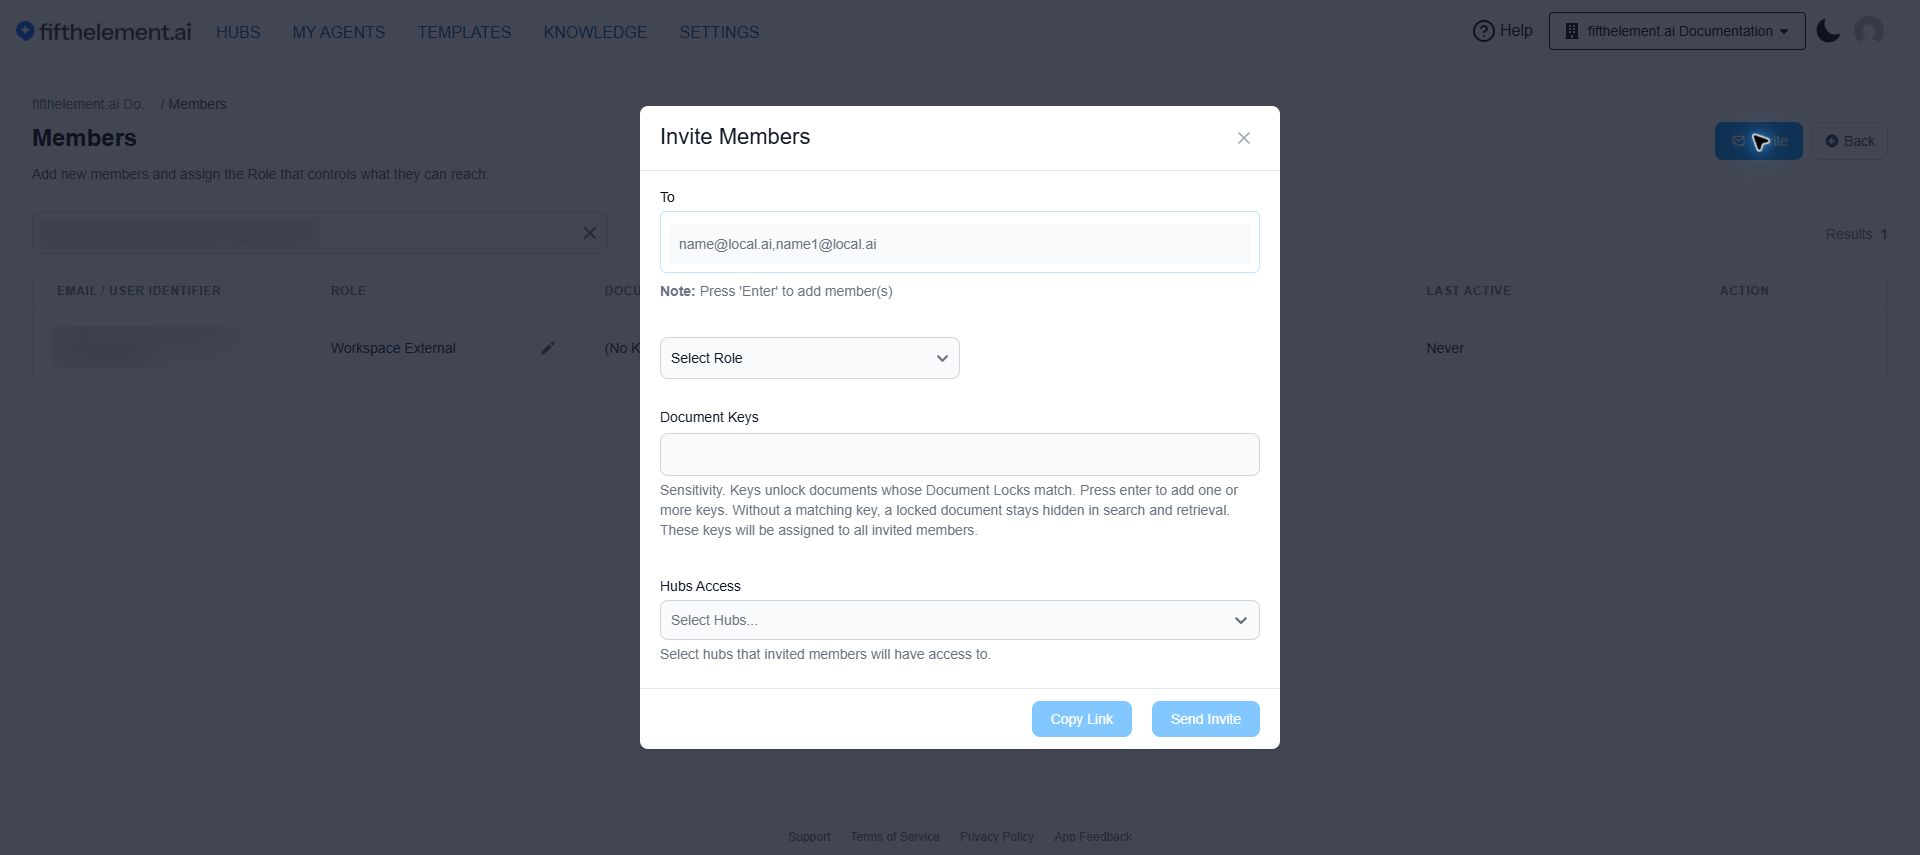
Invite member modal with Hubs assignment dropdown
Steps
- Navigate to Workspace > Members
- Click Invite
- Fill in user details:
- To: Enter the email address and press Enter to add it
- Role: Select a workspace role
- In Hubs Access, select which hubs to assign. Add Document Keys only when those members need access to documents with matching locks.
- Click Send Invite
What Happens
- User receives an invitation email
- Upon accepting, they gain access to:
- Hubs assigned to their role
- Hubs directly assigned during invitation
- They see all assigned hubs on their landing page
For Existing Users
You can modify hub access for users already in your workspace.
Steps
- Navigate to Workspaces > {your-workspace} > Members.
- Find the member and review the Hubs column.
- Use the column's editing control to update the assignment.
- Reopen the member record to verify the saved assignment, then check the Hubs page using the intended user's account.
User Experience
Landing Page
Open Hubs from the top navigation. The initial page after sign-in depends on the default homepage selected in the account settings.
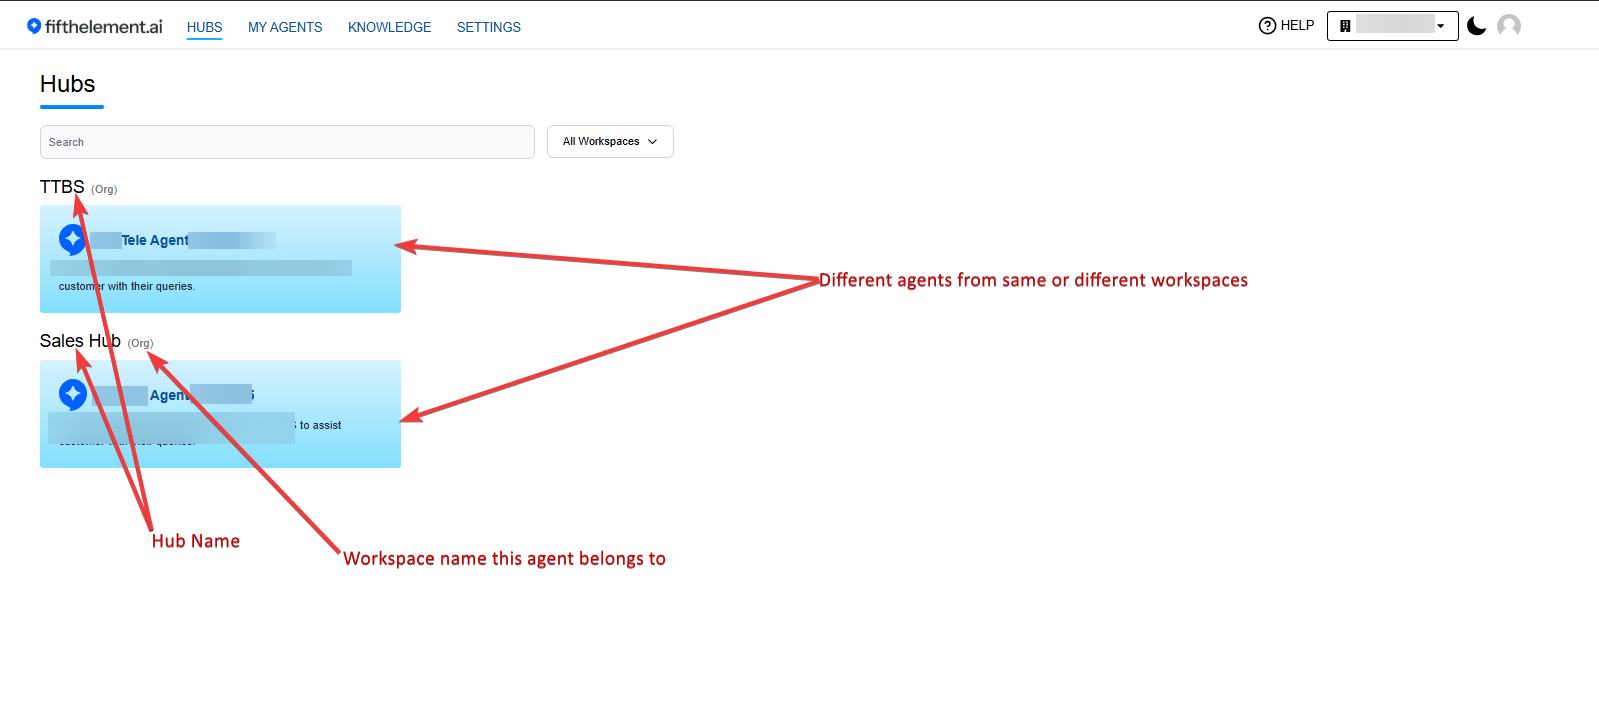
User view of Hubs landing page with agent cards
What Users See
- All Accessible Hubs: Based on role and direct assignments
- Agent Cards: Visual cards for each agent within hubs
- Quick Access: One-click access to start chatting with any agent
- Hub Names: Clear organization by hub
Accessing Agents
Open an agent card to use the agent. Hub access and agent-management permissions are separate: entering through a Hub does not itself establish whether a member can edit or delete an agent. Review the member's role, scope and creator access in RBAC & Roles.
For a consumer-only setup, verify the intended user can open the assigned agent and that management actions are unavailable under that user's account. An Owner's view is not a consumer-role test.
Access Denied Scenarios
If a user attempts to access an agent they don't have permission for:
Common Causes
- User's hub assignment was revoked
- User's role no longer has access to the hub
- Agent was removed from the hub
- Workspace permissions changed
Resolution
- Contact workspace admin to verify access
- Check if you need to be reassigned to the hub
- Verify your role has the necessary permissions
Permission Scenarios
Scenario 1: Role-Based Access Only
Setup: - Hub assigned to "Sales Team" role - User has "Sales Team" role - User is not directly assigned to the hub
Result: User can access the hub
Scenario 2: Direct User Assignment Only
Setup: - Hub assigned to "Marketing" role - User has "Support" role (not Marketing) - User is directly assigned to the hub
Result: User can access the hub
Scenario 3: Both Role and Direct Assignment
Setup: - Hub assigned to "Support" role - User has "Support" role - User is also directly assigned to the hub
Result: User can access the hub (redundant but valid)
Scenario 4: No Assignment
Setup: - Hub assigned to "Engineering" role - User has "Sales" role - User is not directly assigned to the hub
Result: User cannot access the hub
Managing Access at Scale
For Small Teams (1-20 users)
- Direct user assignment is manageable
- Can customize hub access per user
- Easier to handle exceptions
For Medium Teams (20-100 users)
- Prefer role-based assignments
- Use direct assignment for edge cases
- Create specialized roles if needed
For Large Teams (100+ users)
- Must use role-based access
- Minimize direct user assignments
- Create hierarchical role structure
- Automate user provisioning if possible
Access Audit and Compliance
Regular Access Reviews
Perform quarterly access audits:
- Review Hub Assignments
- List all hubs and their assigned roles/users
- Verify assignments are still appropriate
-
Remove outdated assignments
-
Check User Permissions
- Review users with direct hub assignments
- Confirm they still need access
-
Convert direct assignments to role-based when possible
-
Document Changes
- Keep a log of access changes
- Note reasons for modifications
- Track who approved changes
Compliance Considerations
- Least Privilege Principle: Grant minimum necessary access
- Separation of Duties: Different teams access different hubs
- Access Justification: Document why users/roles have hub access
- Regular Certification: Managers verify team access periodically
Troubleshooting Access Issues
User Cannot See Hub
Issue: User reports they cannot see a hub they should have access to
Diagnosis: 1. Verify user's role in Workspace > Members 2. Check hub's role assignments in Workspace > Hubs 3. Check if user is directly assigned to the hub 4. Confirm user is a member of the workspace
Solution: - Add user's role to the hub, OR - Directly assign the user to the hub - If role is assigned, ask user to log out and log back in
User Sees Hub But No Agents
Issue: User can see the hub but no agents appear inside
Diagnosis: 1. Check if hub has any agents assigned 2. Verify agents still exist in the workspace 3. Check if agents were removed from the hub
Solution: - Edit the hub and add agents - Verify agents are active in My Agents - Re-assign agents to the hub if necessary
Cannot Assign Hub During Invitation
Issue: Hubs dropdown is empty when inviting a user
Diagnosis: 1. Check if any hubs exist in the workspace 2. Verify you have permission to view hubs 3. Confirm you're in the correct workspace
Solution: - Create at least one hub first - Verify you have admin or hub creation permissions - Switch to the correct workspace if needed
Related Topics
- Creating Hubs - How to create new hubs
- Managing Hubs - Edit and delete hubs
- Workspaces > RBAC Settings > RBAC Roles - Configure roles and permissions
- Workspace Settings - Manage workspace configuration