Agent Builder
Complete step-by-step guide to creating and configuring AI agents in the fifthelement.ai platform.
Overview
The Agent Builder provides a comprehensive interface for creating and configuring AI agents. The configuration is organized into accordion sections, each handling specific aspects of your agent's setup and behavior.
This guide walks you through all available configuration sections and options.
Prerequisites
Before you begin, ensure you have:
- Access to https://PLATFORM-URL-PLACEHOLDER platform
- Appropriate permissions to create new agents
- Basic understanding of AI agent concepts
- (Optional) Pre-configured processors in Settings
- (Optional) Knowledge repository for RAG capabilities
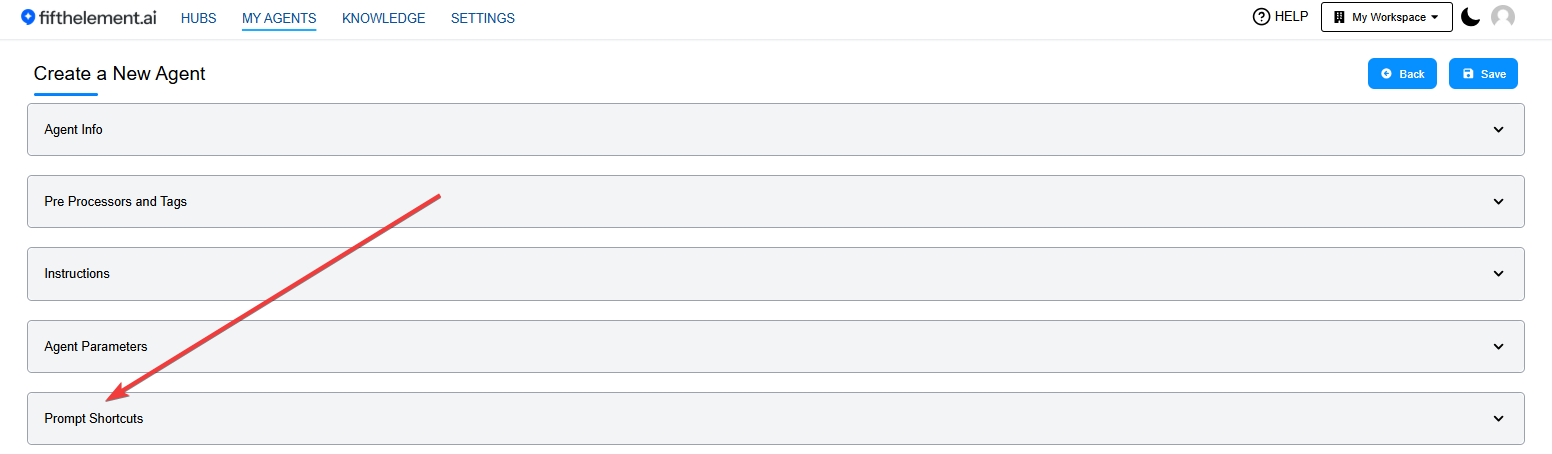
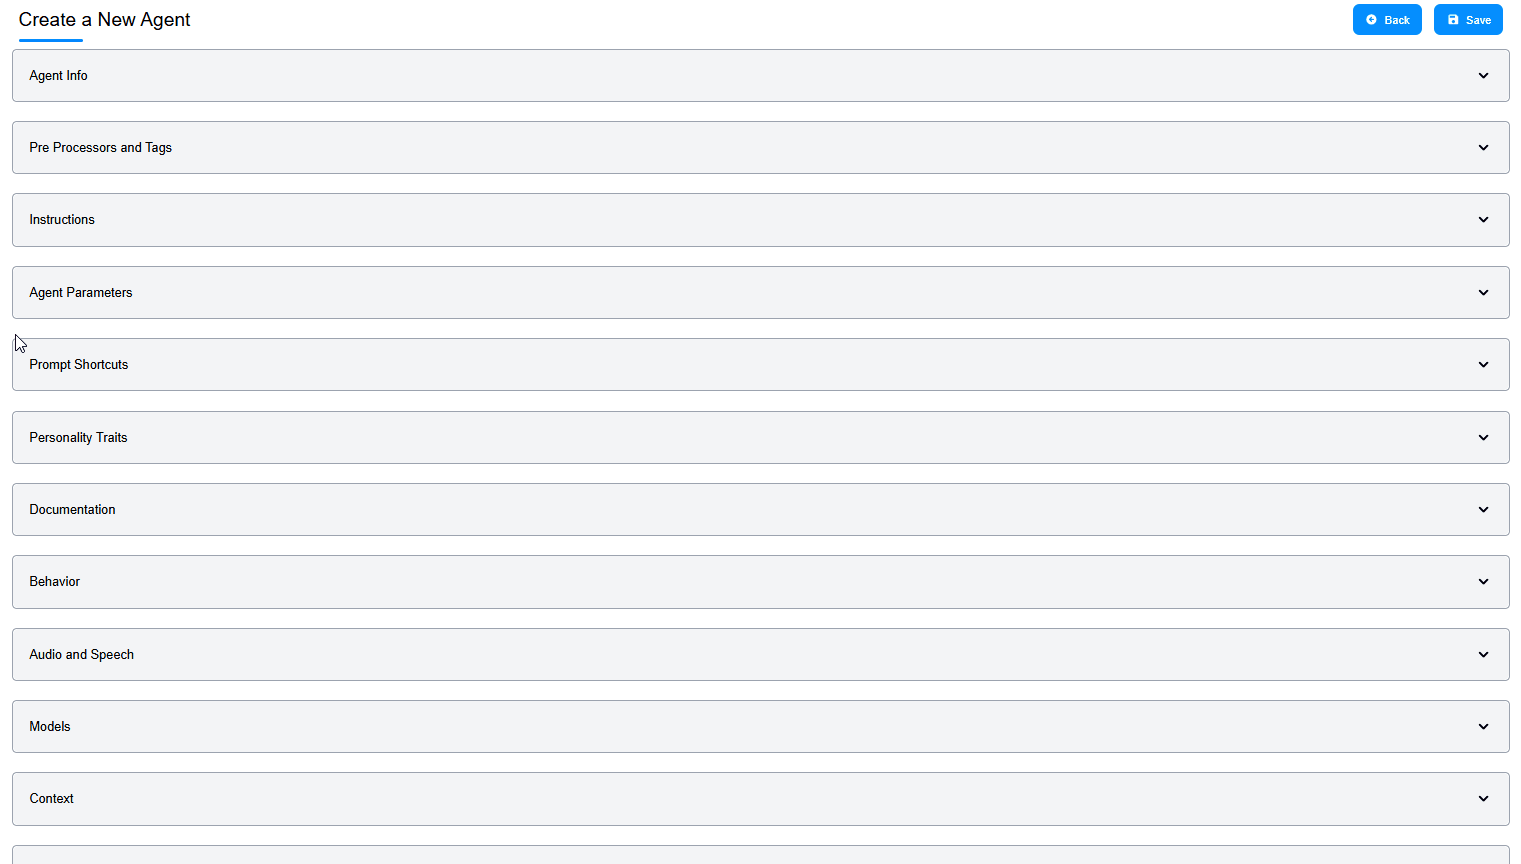
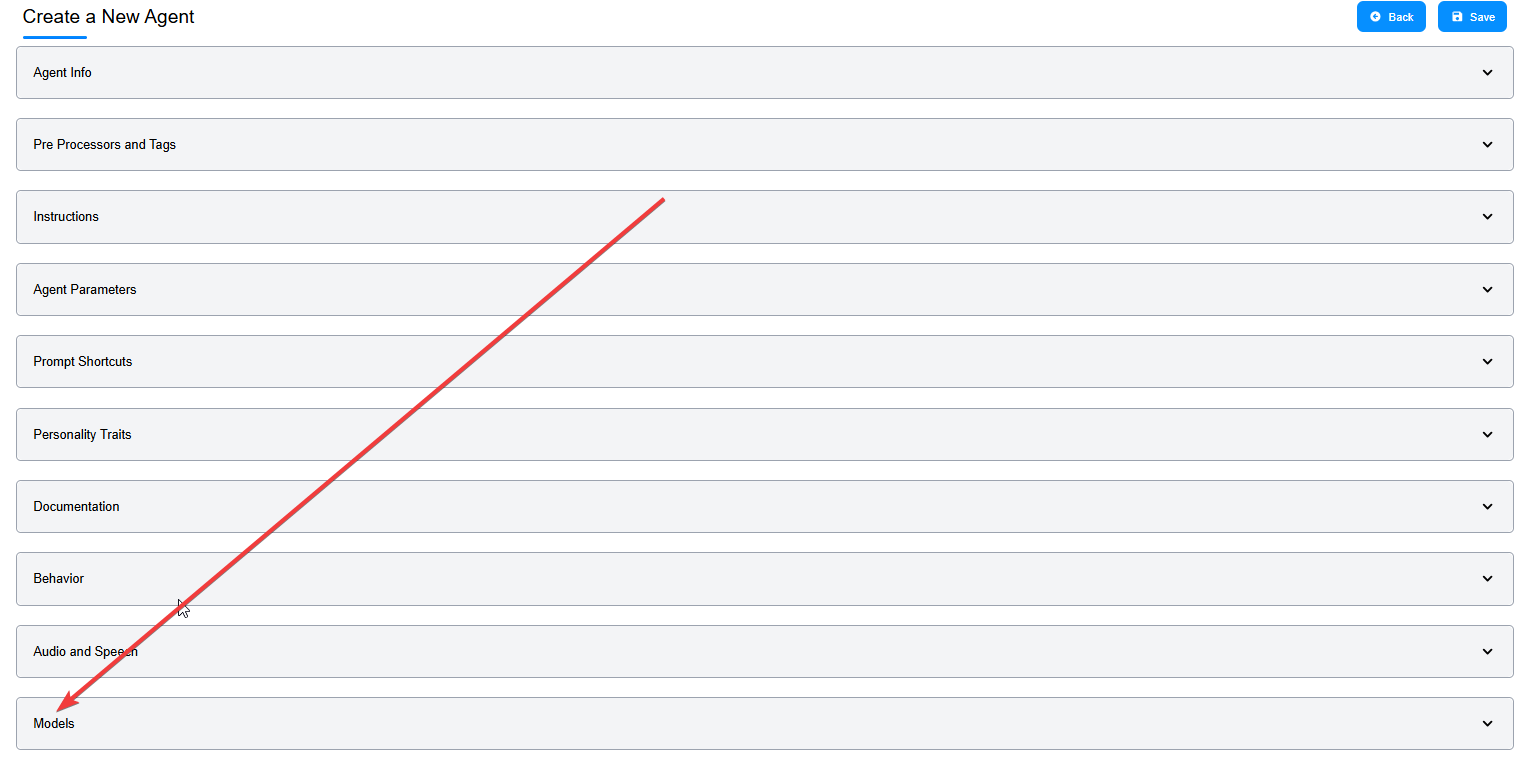
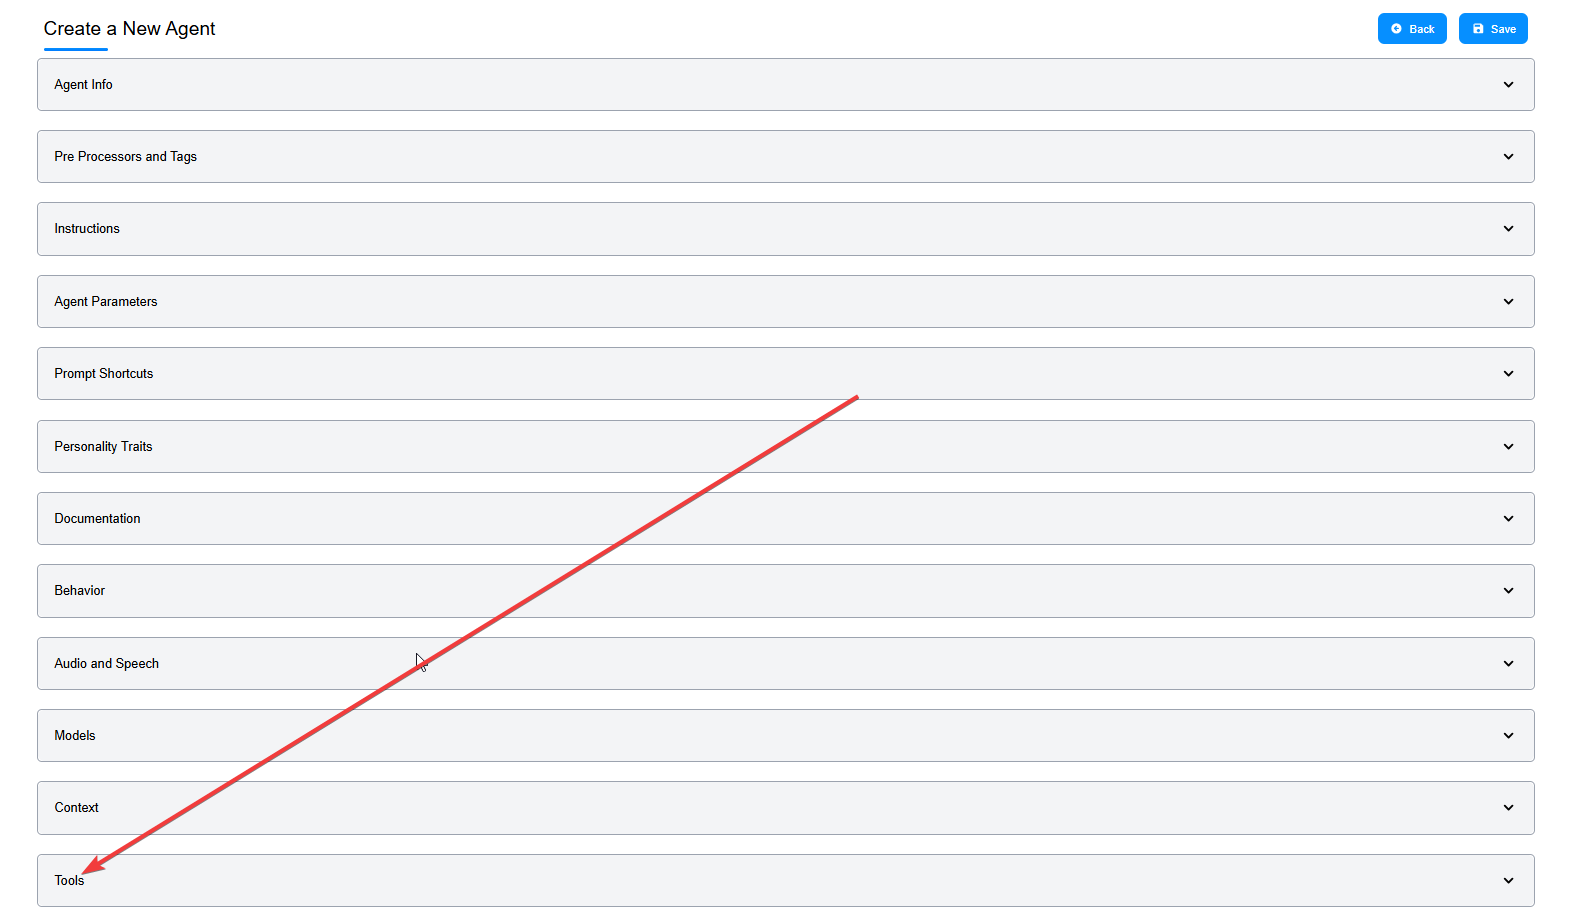
Agent Builder Accordion Sections
When you create a new agent, you'll see the following configuration sections:
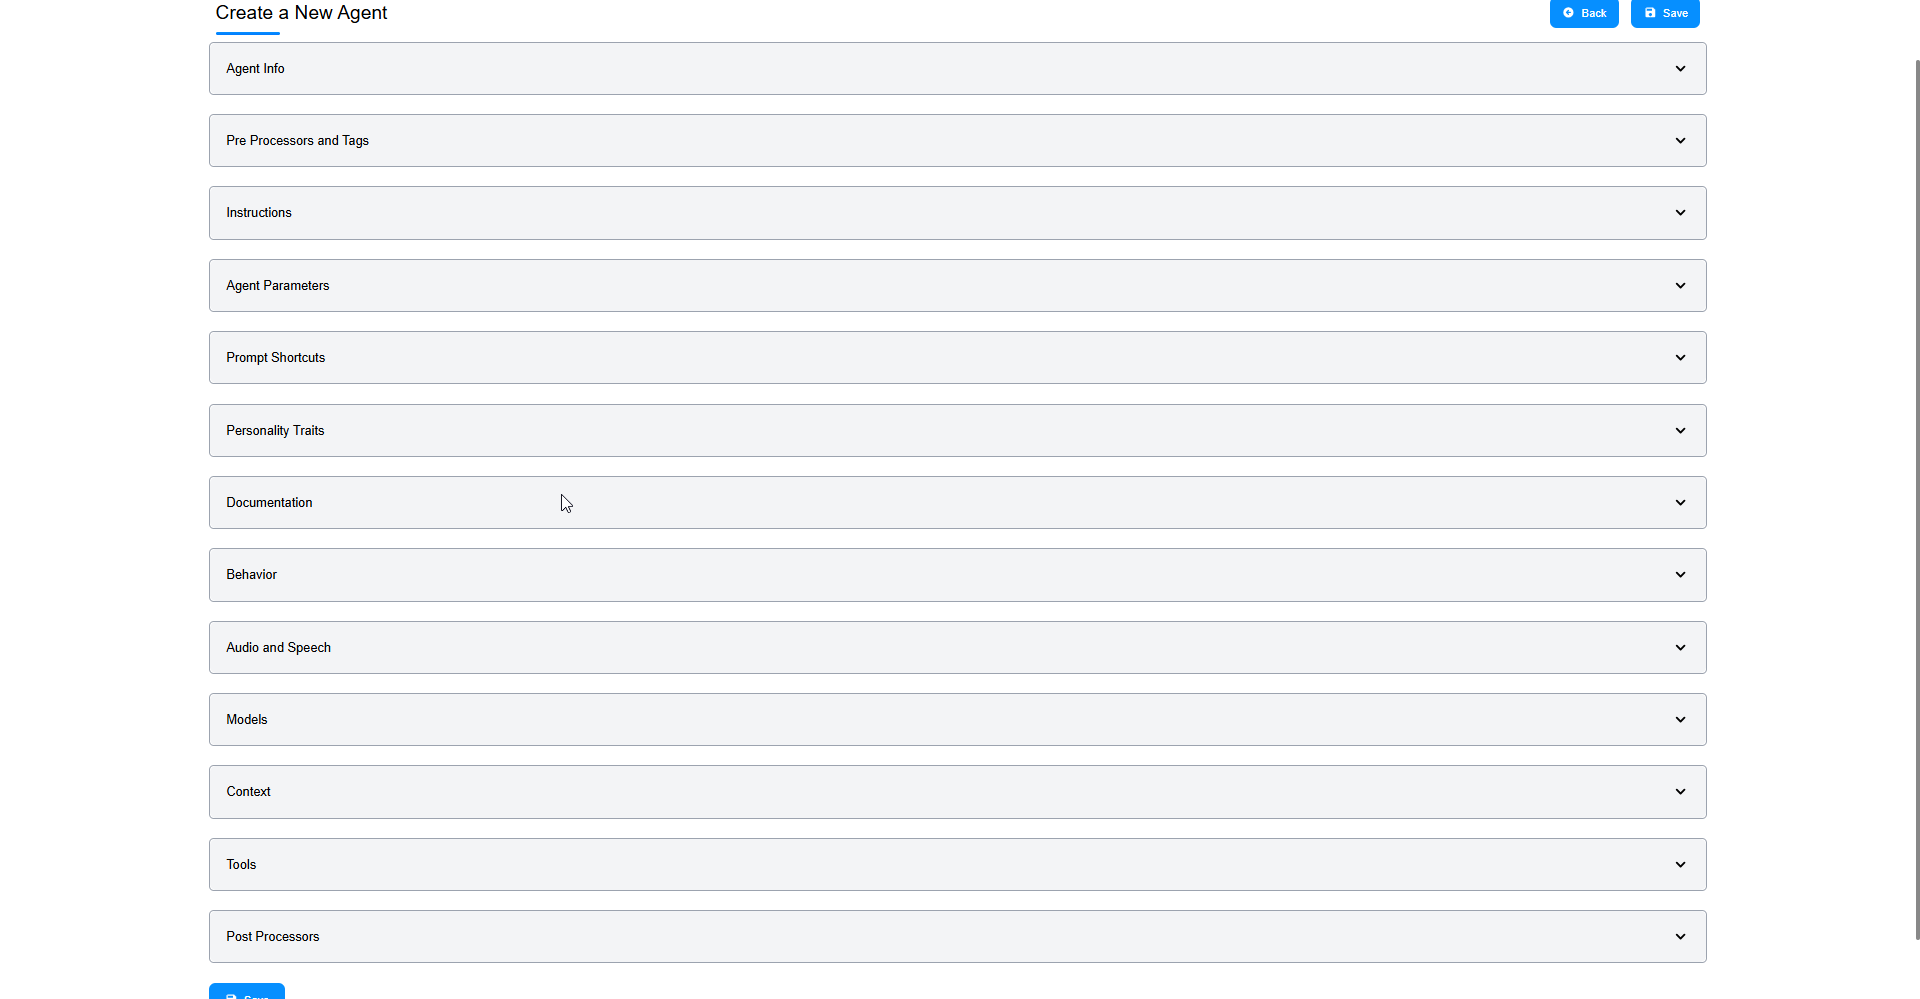 All available accordion sections in the Agent Builder
Available Sections:
- Agent Info - Basic agent configuration and type
- Pre Processors and Tags - Dynamic tagging and pre-processing
- Instructions - Core agent behavior and guidelines
- Agent Parameters - Dynamic variables for instructions
- Prompt Shortcuts - Quick actions for users
- Personality Traits - Agent personality configuration
- Documentation - User-facing agent documentation
- Behavior - Advanced behavior settings
- Audio and Speech - Voice processing configuration
- Models - Language model selection
- Context - Context management settings
- Tools - External integrations and capabilities
- Post Processors - Response analysis and evaluation
1. Agent Info Configuration
Overview
The Agent Info section defines the basic properties, type, and modalities of your agent.
 Agent Info configuration section
Agent Info Fields
Required Fields:
Name: - Internal agent identifier - Used in platform, logs, and management - Best practice: Descriptive and purpose-driven - Example: "Customer Support Agent", "Product Knowledge Bot"
AI Name: - Display name shown to end-users - Character limit: 10 characters - Represents the agent's personality - Example: "Alex", "JiaAI", "Aly"
Description: - Agent's purpose and capabilities - Helps team members understand the agent - Include: What it does, use cases, target audience
Notes (Optional): - Internal notes for administrators - Configuration reminders, change history, etc. - Not visible to end-users
Agent Icon: - Visual representation of your agent - Select from available icon options
Agent Type Selection
Choose between two agent types based on your use case:
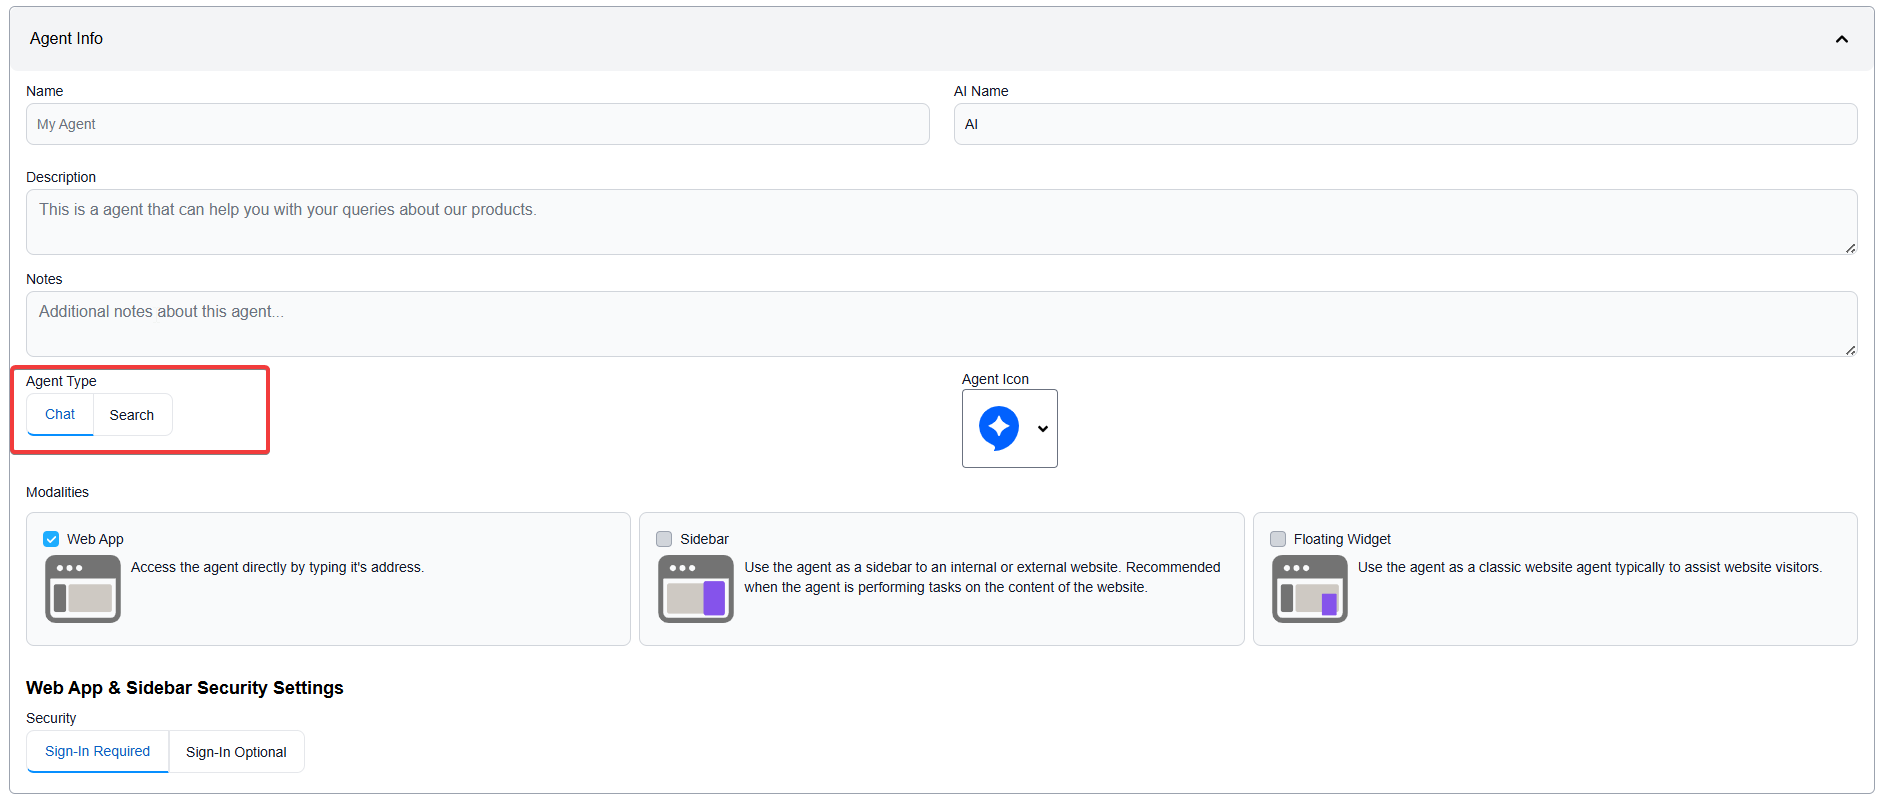 Select between Chat Agent and Search Agent
Chat Agent: - Interactive conversational agent - Maintains conversation history - Best for customer support, assistance, Q&A - Supports multi-turn dialogues
Search Agent: - Optimized for information retrieval - Returns search-style results - Best for knowledge base queries, documentation search - Focused on accuracy over conversation
Modalities
Select which channels your agent will be available on:
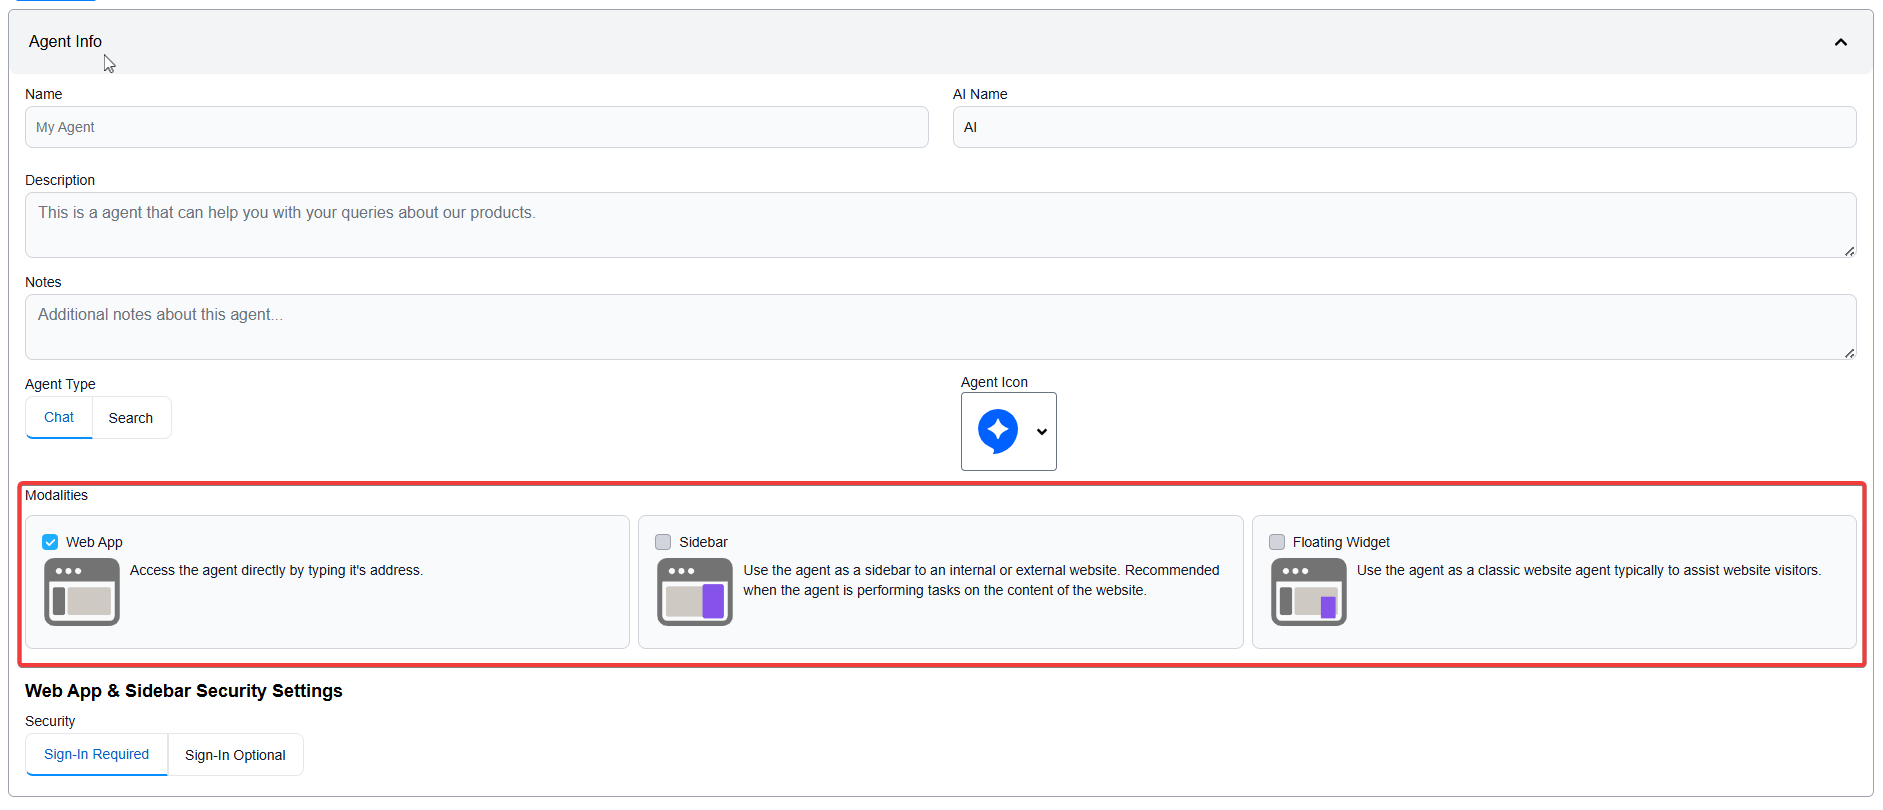 Configure agent modalities - Web App, Sidebar, Floating Widget
Available Modalities:
Web App: - Standalone web application - Full-featured chat interface - Access via direct URL - Best for: Primary customer-facing applications
Sidebar: - Integrated sidebar for websites - Appears on the side of web pages - Recommended for content-heavy websites - Best for: Documentation sites, internal portals
Floating Widget: - Classic website chat widget - Appears as floating button - Minimalist and non-intrusive - Best for: General website visitor assistance
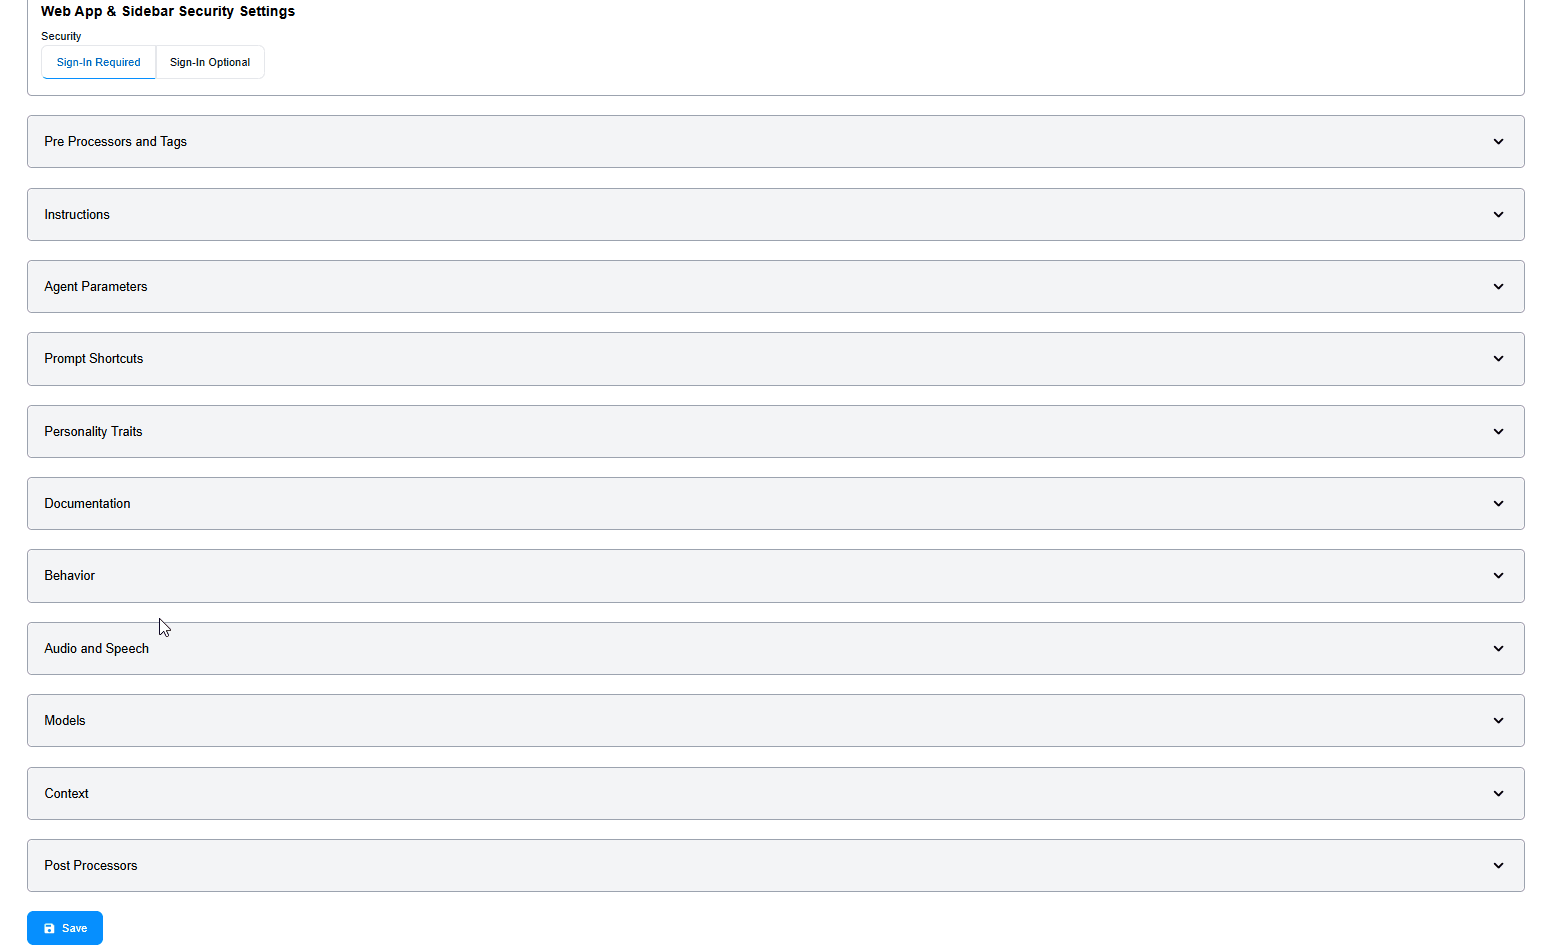
Security Settings
Configure authentication requirements:
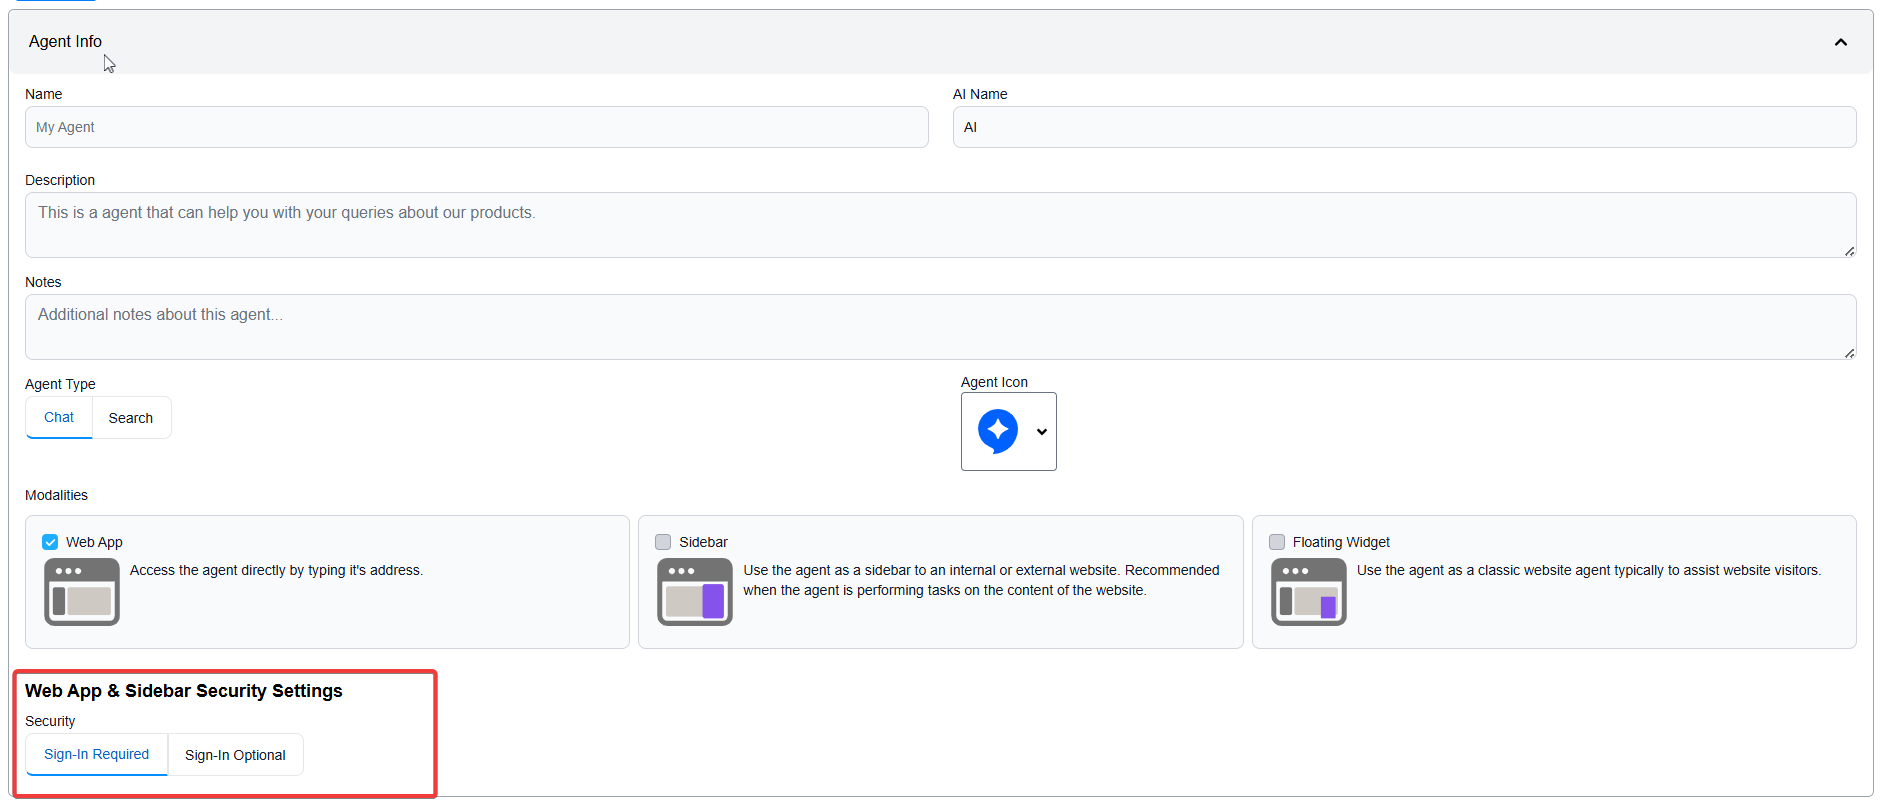 Security configuration for Web App and Sidebar modalities
Options:
Sign-In Required: - Users must authenticate before using the agent - Provides user attribution and conversation tracking - Best for: Internal tools, customer portals
Sign-In Optional: - Agent accessible without authentication - Optional login for enhanced features - Best for: Public-facing agents with optional personalization
2. Pre Processors and Tags
Overview
Pre Processors execute JavaScript code before the user query is sent to the LLM. They can dynamically set tags based on user context, authentication status, session data, or any custom logic.
 Pre Processors and Tags configuration
How Pre Processors Work
Workflow: 1. User sends a message 2. Pre Processor executes (JavaScript snippet) 3. Pre Processor returns tags based on logic 4. Tags determine agent behavior, shortcuts visibility, tool availability 5. Query is sent to LLM with tag context
Adding Pre Processors
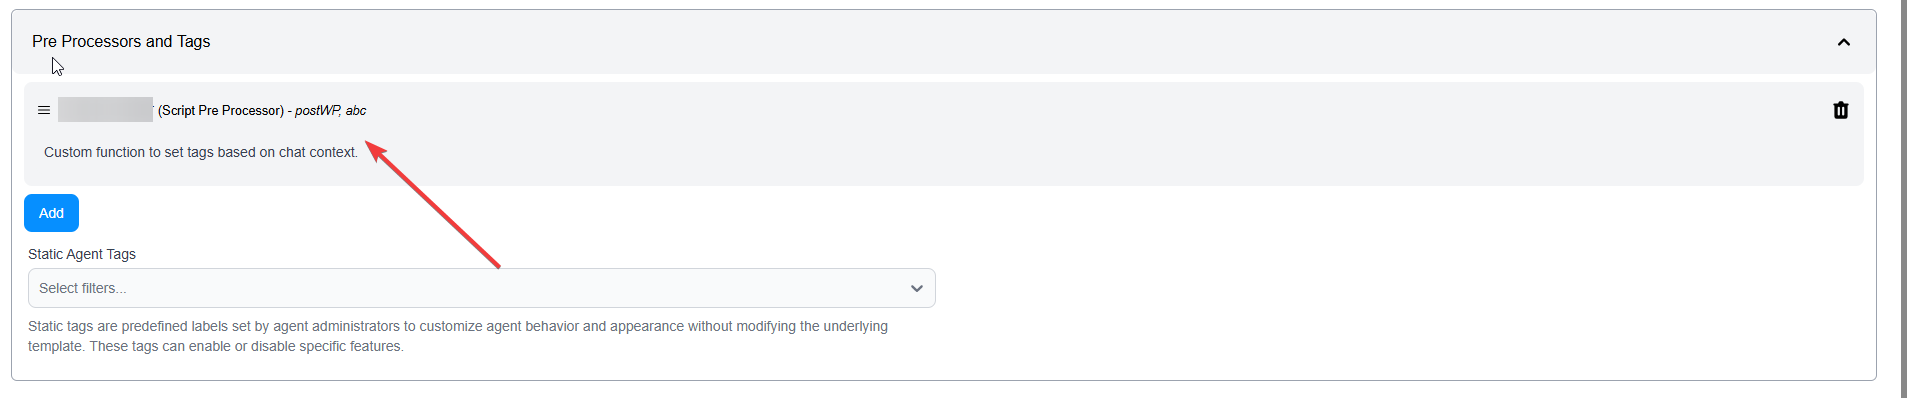 Pre Processor added to agent with tag configuration
Steps:
- Configure Pre Processor in Settings (see Settings > Processors for details)
- Click "Add" button in Pre Processors section
- Select configured pre processor from list
- Configure tags returned by the pre processor
Static Agent Tags
Use Cases:
- Control feature availability
- Set agent behavior flags
Use Case Example: Authentication-Based Behavior
Scenario: Show different shortcuts based on authentication status
Pre Processor Logic:
// preprocessor example
const subscriberid = ld.get(data, 'user_data.subscriberid', null);
if (subscriberid !==" ") {
  ctx.addTag('authenticated');
} else {
  ctx.addTag('unauthenticated');
}
Tag Configuration:
- Tag:
authenticated→ Shows "View My Account", "Order History" shortcuts - Tag:
unauthenticated→ Shows "Sign Up", "Learn More" shortcuts
Benefits:
- Dynamic agent behavior based on user state
- Personalized experience
- Controlled feature access
3. Instructions
Overview
Instructions define the core behavior, role, and operating principles of your AI agent. This is the most critical section that shapes how your agent responds and behaves.
 Configuring agent instructions
What to Include
Role Definition:
You are a customer support agent for fifthelement.ai, specializing in
helping users understand our AI platform features.
Responsibilities:
Your responsibilities include:
- Answering questions about platform features
- Helping users troubleshoot configuration issues
- Providing step-by-step guidance for agent setup
- Escalating complex technical issues when necessary
Behavior Guidelines:
Communication Style:
- Professional yet friendly tone
- Concise and action-oriented responses
- Use bullet points for clarity
- Provide examples when explaining concepts
Constraints:
Limitations:
- Do not provide information about pricing (direct to sales team)
- Do not make promises about future features
- Admit when you don't know something rather than guessing
- Always verify information from the knowledge base
Response Format:
When answering questions:
1. Provide a direct answer first
2. Add context or explanation if needed
3. Offer related resources or next steps
4. Ask if the user needs further clarification
Using Agent Parameters in Instructions
You can use dynamic parameters in instructions using the syntax: {botParams.<key>}
Example:
You are assisting users for {botParams.company_name}.
Our primary product is {botParams.product_name}.
Support hours: {botParams.support_hours}
These parameters are configured in the Agent Parameters section (see below).
4. Agent Parameters
Overview
Agent Parameters are dynamic variables that can be used within agent instructions using {botParams.<key>} syntax. They allow you to create reusable templates and easily update values without modifying core instructions.
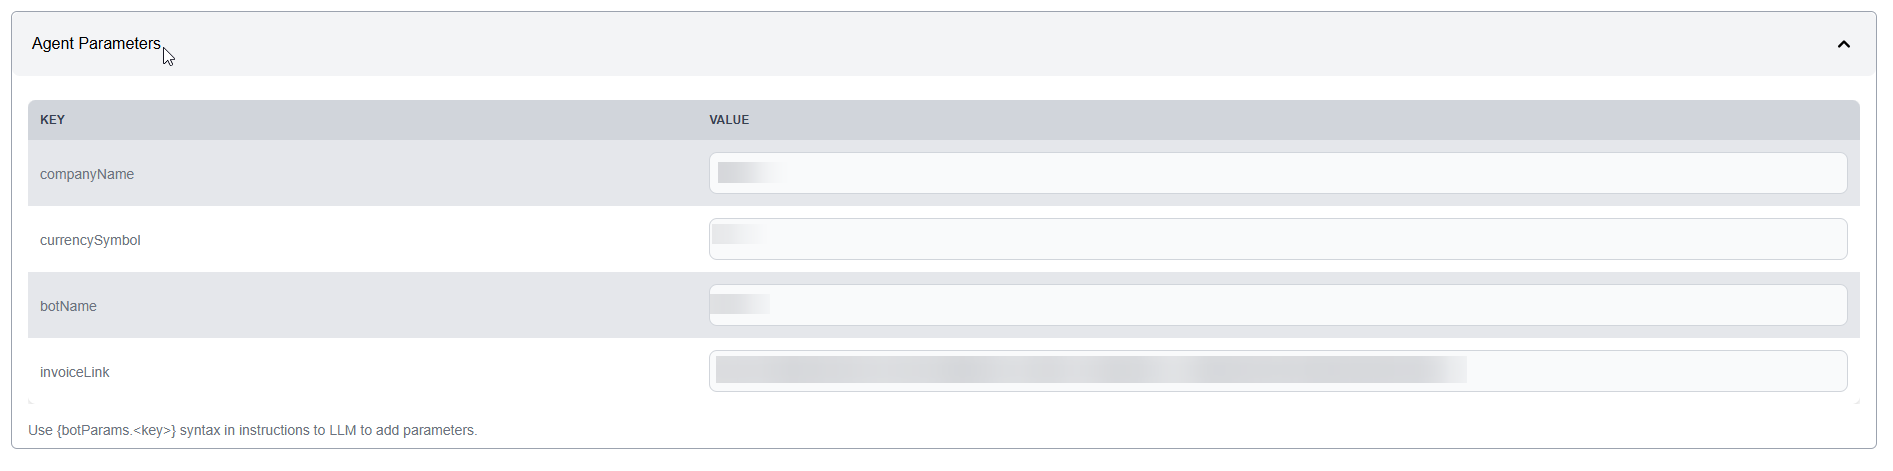 Agent Parameters configuration
How to Use
Step 1: Define Parameters
Add key-value pairs in the Agent Parameters section:
Example:
company_name: fifthelement.ai
product_name: AI Agent Platform
support_hours: 9 AM - 6 PM EST
support_email: support@fifthelement.ai
documentation_url: https://docs.fifthelement.ai
Step 2: Reference in Instructions
Use parameters in your instructions:
You are a support agent for {botParams.company_name}.
Our product, {botParams.product_name}, is an enterprise AI platform.

If users need help:
- Support hours: {botParams.support_hours}
- Email: {botParams.support_email}
- Documentation: {botParams.documentation_url}
Benefits: - Easy updates without touching instructions - Reusable agent templates - Multi-environment configuration (dev, staging, prod) - Centralized value management
5. Prompt Shortcuts
Overview
Prompt Shortcuts are pre-defined quick actions that users can trigger with a single click. They improve user experience by providing guided interactions and common use cases.
 Prompt Shortcuts configuration section
 Adding a prompt shortcut
Shortcut Configuration
Fields:
Label (Required): - Text displayed to users - Action-oriented and clear - Example: "Check Order Status", "Get Product Info", "Troubleshoot Login"
Prompt (Required): - Instruction sent to agent when clicked - Can include variables: {order_number}, {user_email} - Example: "Provide the current status of order {order_number} including shipping details"
Options:
- Shortcut is Required: Make this a mandatory first interaction
- Use Chat History: Include previous conversation context
- Display Mode: Choose visibility behavior (always visible, contextual, button-style)
Tag-Based Shortcut Visibility
Shortcuts can be scoped to specific tags (from Pre Processors):
Example:
Shortcut 1: "View My Account" → Tag: authenticated Shortcut 2: "Sign Up for Free" → Tag: unauthenticated
Result: - Authenticated users see "View My Account" - Unauthenticated users see "Sign Up for Free"
6. Personality Traits
Overview
Personality Traits allow you to fine-tune your agent's conversational style and tone. Select up to 5 traits from various personality dimensions.
 Personality Traits configuration with multiple trait dimensions
Available Traits
Each dimension has three options: Left Extreme, None (Neutral), Right Extreme
Trait Dimensions:
| Dimension | Left | None | Right |
|---|---|---|---|
| Humor | Funny | None | Serious |
| Confidence | Modest | None | Arrogant |
| Emotion | Happy | None | Sad |
| Risk-Taking | Adventurous | None | Cautious |
| Cooperation | Agreeable | None | Disagreeable |
| Ambition | Ambitious | None | Content |
| Assertiveness | Confident | None | Insecure |
| Certainty | Decisive | None | Indecisive |
| Empathy | Empathetic | None | Apathetic |
| Sociability | Extroverted | None | Introversion |
| Formality | Formal | None | Informal |
| Independence | Independent | None | Dependent |
| Optimism | Optimistic | None | Pessimistic |
| Playfulness | Playful | None | Serious |
| Creativity | Creative | None | Conventional |
| Spontaneity | Spontaneous | None | Predictable |
| Dominance | Dominant | None | Submissive |
| Open-Mindedness | Open minded | None | Closed minded |
| Detail Orientation | Brief | None | Detailed |
| Encouragement | Encouraging | None | Critical |
| Energy Level | Energetic | None | Calm |
Best Practices
Maximum 5 traits can be selected to avoid conflicting personalities.
Example Configurations:
Customer Support Agent: - Empathetic - Formal - Detailed - Encouraging - Calm
Marketing Content Agent: - Creative - Energetic - Optimistic - Playful - Confident
Technical Documentation Agent: - Detailed - Formal - Decisive - Independent - Predictable
7. Documentation
Overview
The Documentation section allows you to create user-facing information about your agent. This content is displayed when users open the agent in Web App modality via the "How to use this agent - Quick Guide" button.
 Documentation configuration with rich text editor
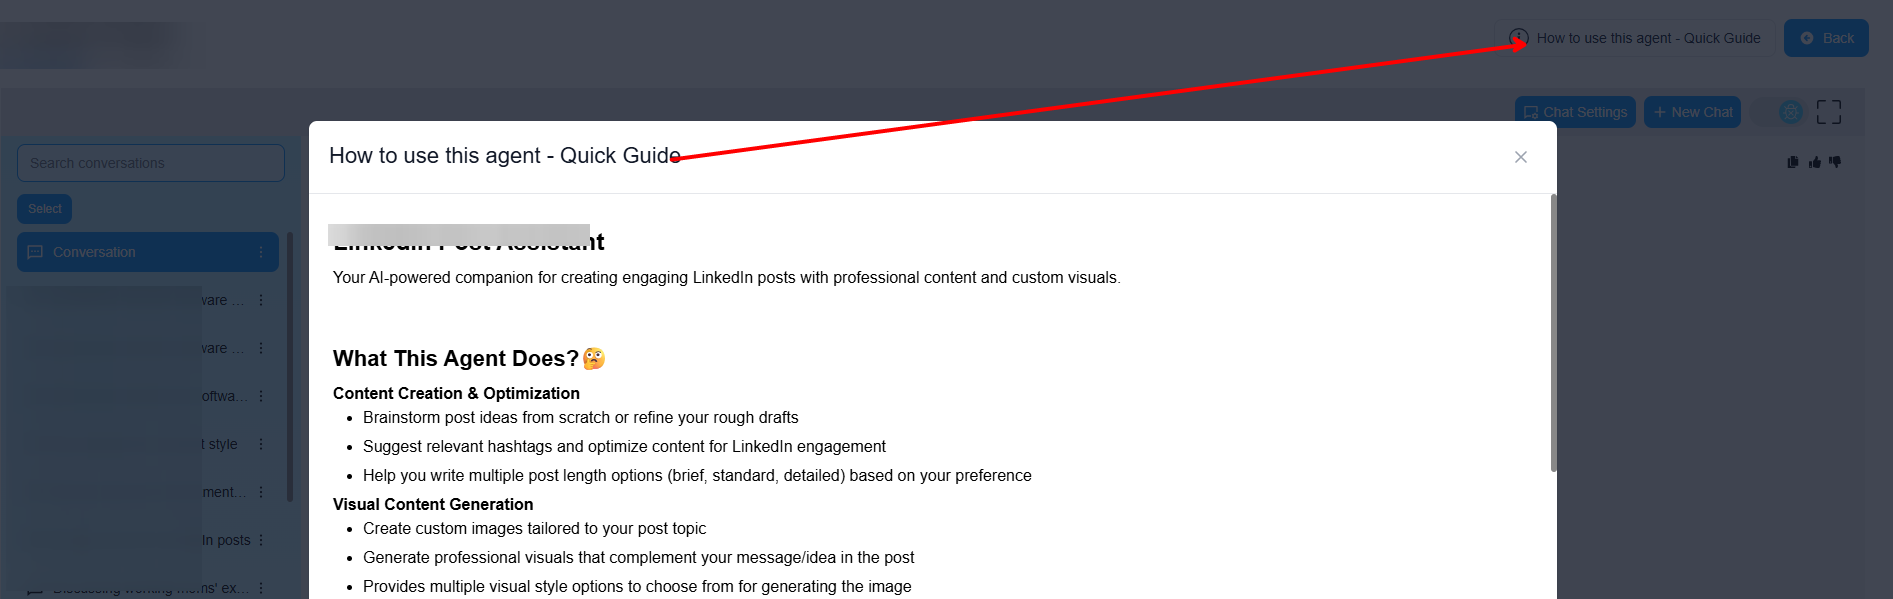 Documentation shown to users in Web App modality
What to Include
User Documentation Label: - Title displayed above the documentation - Default: "About this Agent" - Example: "Quick Start Guide", "Agent Capabilities", "How to Use"
User Documentation (Rich Text):
Recommended Content:
1. Agent Purpose:
This agent helps you find information about our products,
troubleshoot common issues, and connect with support.
2. What It Can Do:
✓ Answer product questions
✓ Provide troubleshooting steps
✓ Search documentation
✓ Escalate to human agents
3. How It Works:
1. Ask your question in natural language
2. The agent will search our knowledge base
3. Receive instant answers with source links
4. Use shortcuts for common tasks
4. Best Practices:
• Be specific in your questions
• Use shortcuts for faster results
• Provide error messages when troubleshooting
• Rate responses to help improve the agent
5. Limitations:
This agent cannot:
- Process refunds (contact support@company.com)
- Modify account settings directly
- Provide pricing quotes (contact sales)
6. Style Guidelines:
- Professional and helpful tone
- Clear, concise explanations
- Structured with headings and lists
- Include examples where relevant
Rich Text Editor Features
The documentation editor supports:
- Text Formatting: Bold, Italic, Underline, Strikethrough
- Lists: Bulleted and numbered lists
- Headings: Normal, Heading 1, Heading 2, etc.
- Links: Add hyperlinks to resources
- Images: Embed images (if supported)
- Code Blocks: Format code snippets
8. Behavior
Overview
The Behavior section contains advanced settings that control how your agent interacts with users, handles data, and integrates with external systems.
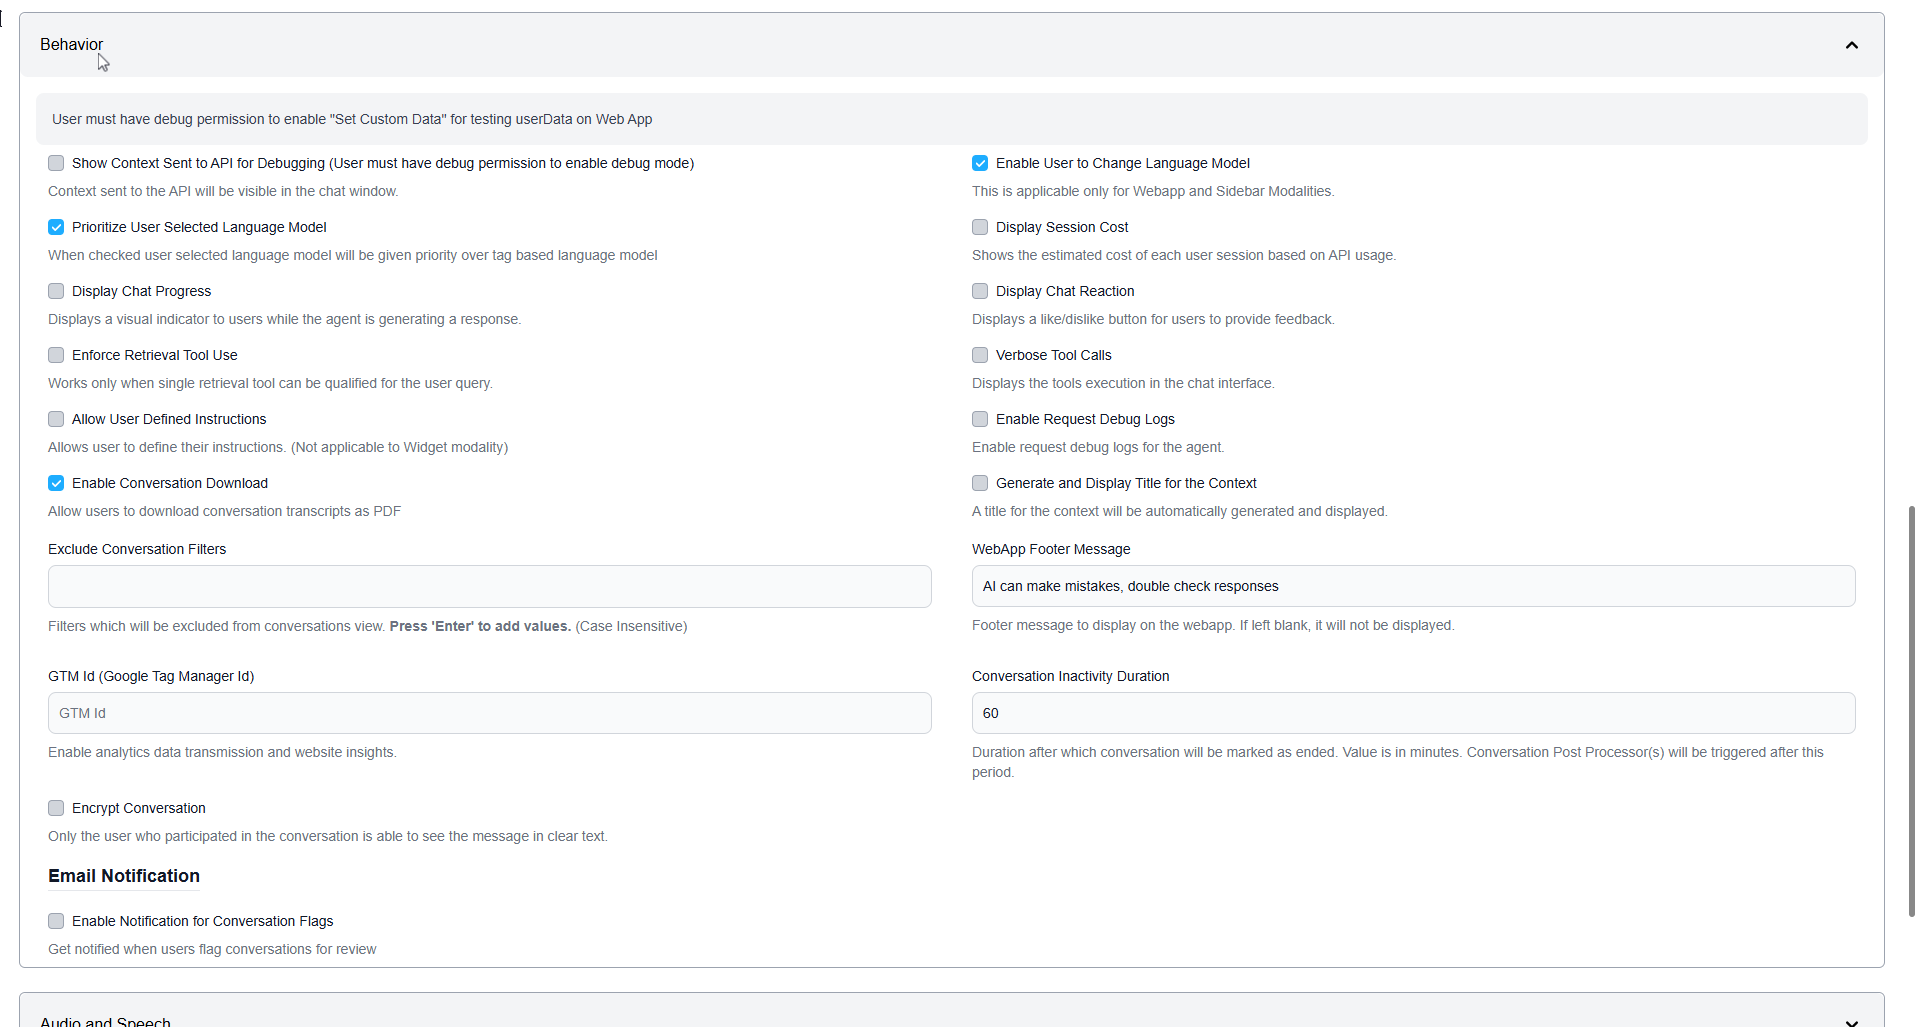 Behavior configuration with various toggles and settings
Behavior Settings
You will see on-screen documentation for each setting:
Debug and Testing
Show Context Sent to API for Debugging:
- Checkbox: Show Context Sent to API for Debugging
- Description: Context sent to the API will be visible in the chat window
- Note: User must have debug permission to enable "Set Custom Data" for testing userData on Web App
- Use Case: Troubleshooting agent responses, verifying context handling
Language Model Control
Prioritize User Selected Language Model:
- Checkbox: Prioritize User Selected Language Model
- Description: When checked, user-selected language model will be given priority over tag-based language model
- Use Case: Allow users to override default model selection
Enable User to Change Language Model:
- Checkbox: Enable User to Change Language Model
- Description: This is applicable only for Webapp and Sidebar Modalities
- Use Case: Give users control over which AI model processes their queries
User Experience Features
Display Chat Progress:
- Checkbox: Display Chat Progress
- Description: Displays a visual indicator to users while the agent is generating a response
- Use Case: Improve perceived responsiveness, set user expectations
Display Session Cost:
- Checkbox: Display Session Cost
- Description: Shows the estimated cost of each user session based on API usage
- Use Case: Cost transparency, usage monitoring
Display Chat Reaction:
- Checkbox: Display Chat Reaction
- Description: Displays a like/dislike button for users to provide feedback
- Use Case: Collect user feedback, improve agent over time
Advanced Features
Enforce Retrieval Tool Use:
- Checkbox: Enforce Retrieval Tool Use
- Description: Works only when single retrieval tool can be qualified for the user query
- Use Case: Ensure knowledge base is always consulted for specific queries
Allow User Defined Instructions:
- Checkbox: Allow User Defined Instructions
- Description: Allows user to define their instructions (Not applicable to Widget modality)
- Use Case: Power users who want to customize agent behavior per session
Enable Conversation Download:
- Checkbox: Enable Conversation Download
- Description: Allow users to download conversation transcripts as PDF
- Use Case: Record-keeping, compliance, user reference
Tool Configuration
Verbose Tool Calls:
- Checkbox: Verbose Tool Calls
- Description: Displays the tools execution in the chat interface
- Use Case: Debugging, transparency in tool usage
Enable Request Debug Logs:
- Checkbox: Enable Request Debug Logs
- Description: Enable request debug logs for the agent
- Use Case: Advanced troubleshooting, API monitoring
Context Display
Generate and Display Title for the Context:
- Checkbox: Generate and Display Title for the Context
- Description: A title for the context will be automatically generated and displayed
- Use Case: Conversation organization, easy conversation identification
Conversation Filters
Exclude Conversation Filters:
- Field: Exclude Conversation Filters
- Description: Filters which will be excluded from conversations view. Press 'Enter' to add values. (Case insensitive)
- Use Case: Hide internal tags, filter out test conversations
Analytics Integration
GTM Id (Google Tag Manager Id):
- Field: GTM Id
- Description: Enable analytics data transmission and website insights
- Use Case: Track agent usage, user behavior analytics
Security
Encrypt Conversation:
- Checkbox: Encrypt Conversation
- Description: Only the user who participated in the conversation is able to see the message in clear text
- Use Case: Sensitive data protection, compliance requirements
Email Notifications
Enable Notification for Conversation Flags:
- Checkbox: Enable Notification for Conversation Flags
- Description: Get notified when users flag conversations for review
- Use Case: Quality monitoring, issue identification
Footer Message
WebApp Footer Message:
- Field: WebApp Footer Message
- Description: Footer message to display on the webapp. If left blank, it will not be displayed
- Example: "AI can make mistakes, double check responses"
- Use Case: Disclaimers, legal notices, helpful reminders
Conversation Timeout
Conversation Inactivity Duration:
- Field: Conversation Inactivity Duration (in minutes)
- Default: 60 minutes
- Description: Duration after which conversation will be marked as ended. Value is in minutes. Conversation Post Processor(s) will be triggered after this period.
- Use Case: Session management, trigger post-conversation analysis
9. Audio and Speech
Overview
Configure real-time voice processing capabilities for your agent, enabling voice interactions via SIP (telephony) or WebSocket (web-based).
 Audio and Speech configuration section
 Configuring audio and speech settings
Realtime Voice Processing
Enable Realtime Voice Processing:
Once enabled, you can configure:
SIP Realtime Voice Processing: - For telephone/SIP integration - Inbound/outbound call handling - Voice-based customer support
Websocket Realtime Voice Processing: - For web-based voice interactions - Browser-based voice chat - Real-time voice responses
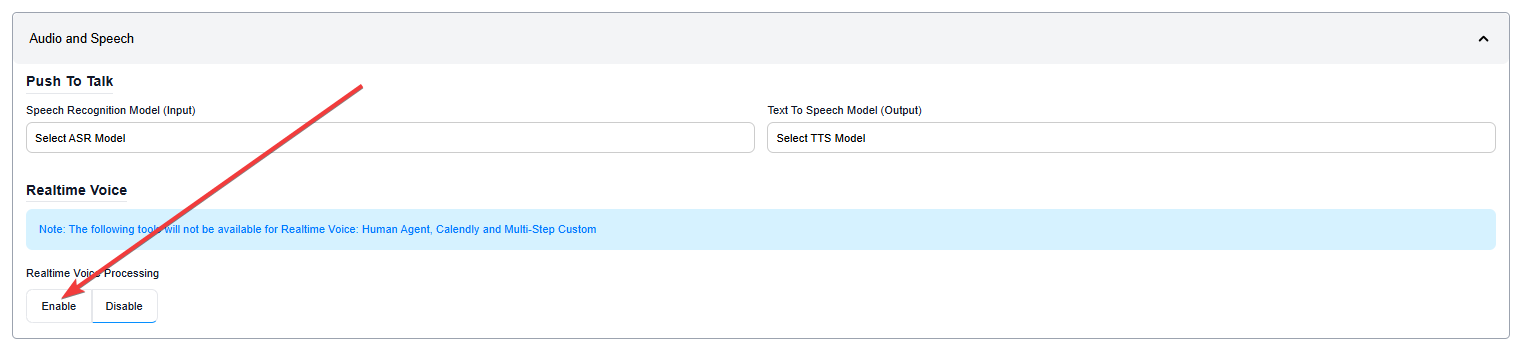 Enable SIP or Websocket realtime voice processing
Configuration Details
Refer to on-screen documentation for detailed configuration of: - Audio codecs - Voice models - Latency settings - Call routing - Interruption handling
10. Models
Overview
Select and configure the language models that power your agent's intelligence and reasoning capabilities.
 Models configuration section
 Selecting and configuring language models
Adding Language Models
Steps:
- Click "Add Language Model" button
- Click the "Select Language Model" dropdown
- Choose from available models:
- Azure GPT 4.1 Mini
- Gemini 2.5 Flash
- Claude 3.5 Sonnet
- GPT-4
- Custom models (via "Add New")
- Click "Save" to apply
Model Selection Considerations
| Factor | Description |
|---|---|
| Response Quality | More advanced models provide better reasoning and accuracy |
| Speed | Some models respond faster (e.g., Mini, Flash models) |
| Cost | Different models have different pricing per token |
| Use Case | Match model capabilities to your agent's complexity |
Example Use Cases:
- Simple FAQ Agent: GPT 4.1 Mini (fast, cost-effective)
- Complex Support Agent: Claude 3.5 Sonnet (strong reasoning)
- Technical Documentation Agent: GPT-4 (high accuracy)
- Conversational Agent: Gemini 2.5 Flash (balanced speed/quality)
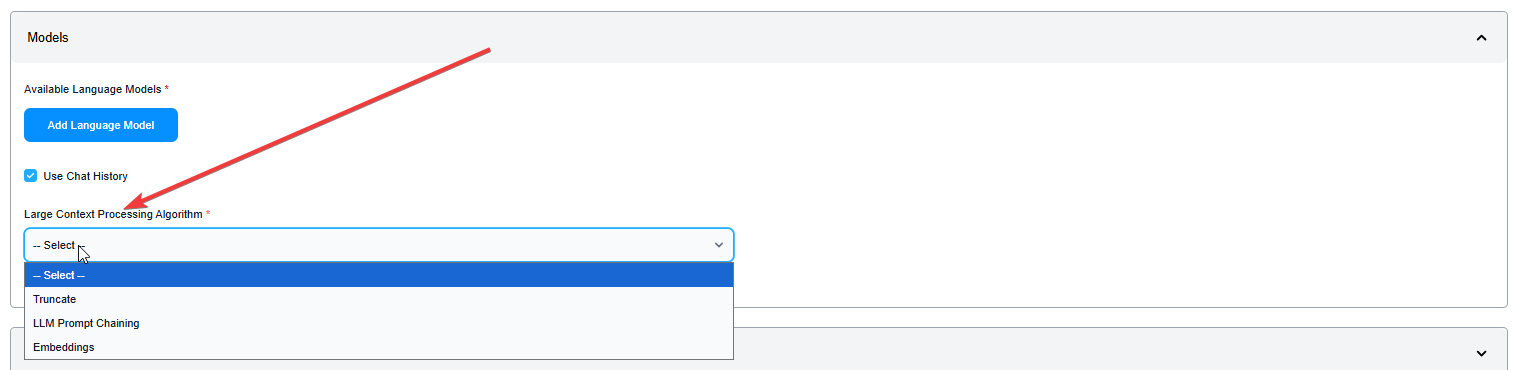
Large Context Processing Algorithm
Required Setting: You must select a Large Context Processing Algorithm before saving the agent.
 Select the Large Context Processing Algorithm
Available Algorithms:
Truncate: - Cuts off context when it exceeds model limits - Fast and simple - May lose important information - Best for: Short conversations, simple queries
Summarize: - Summarizes older context to fit within limits - Maintains conversation continuity - Moderate processing overhead - Best for: Long conversations with historical context
LLM Prompt Chaining: - Breaks down large contexts across multiple prompts - Handles very large contexts - Higher latency and cost - Best for: Complex, multi-step tasks
Embeddings: - Uses vector embeddings for context management - Efficient retrieval of relevant context - Requires vector database setup - Best for: Knowledge-intensive agents with RAG
11. Context
Overview
The Context section allows you to add information that your agent can reference when generating responses. Context can be provided as text, documents, or knowledge repositories.
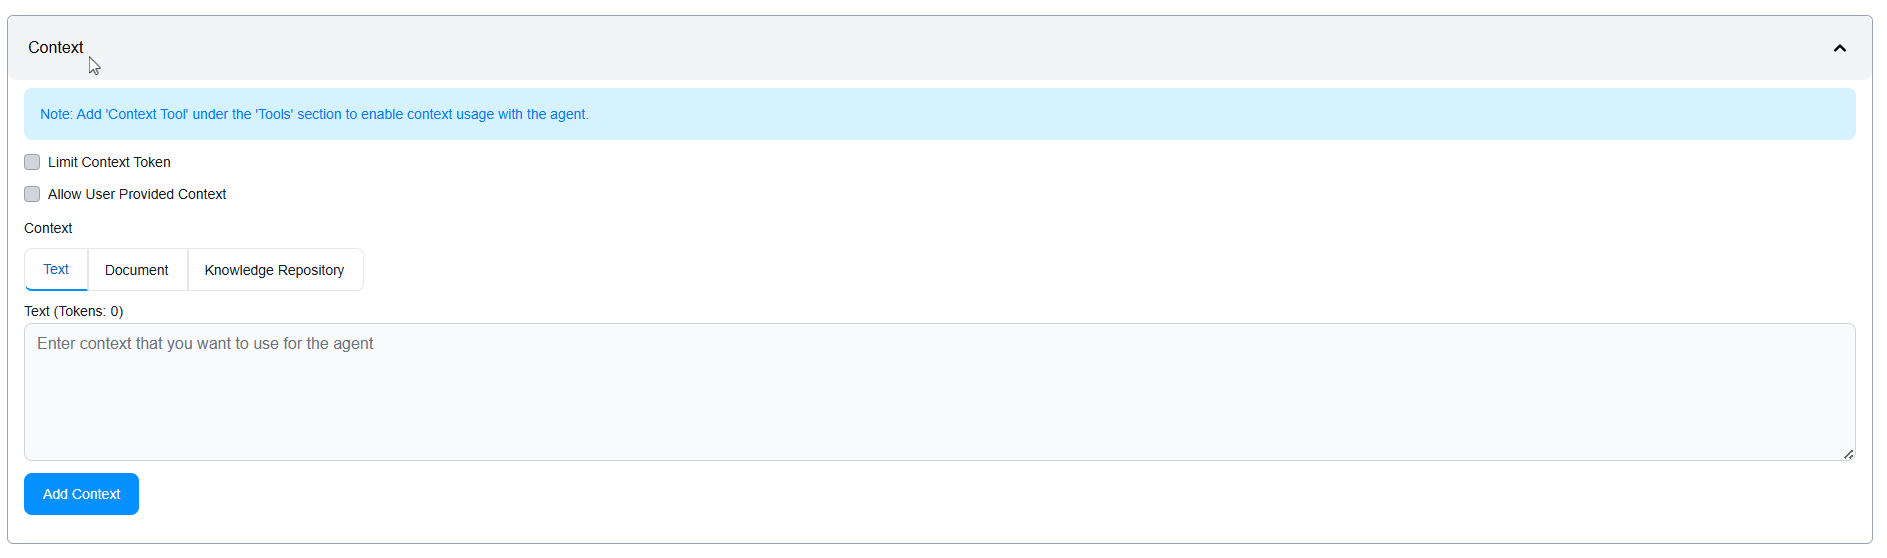 Context configuration with Text, Document, and Knowledge Repository tabs
Context Types
Text: - Direct text input - Quick facts, guidelines, data - Token count displayed - Example: Product specifications, company policies
Document: - Upload documents (PDF, DOCX, TXT, etc.) - Processed and embedded for retrieval - Example: User manuals, technical documentation
Knowledge Repository: - Connect to pre-configured knowledge bases - Vector search enabled - Example: Full documentation sites, FAQs, support articles
Context Notes
Note: Add 'Context Tool' under the 'Tools' section to enable context usage with the agent.
Checkboxes:
Limit Context Token: - Restrict context size to prevent exceeding model limits - Recommended for cost control
Allow User Provided Context: - Let users upload documents or provide additional context per session - Use Case: Custom document analysis, personalized assistance
12. Tools
Overview
Tools extend your agent's capabilities beyond conversation, enabling it to retrieve data, perform actions, and integrate with external systems.
 Tools configuration section
 Adding tools to the agent
Adding Tools
Steps:
- Click "Add" button in Tools section
- Select a tool from available options:
- Knowledge Retrieval - RAG: Access knowledge bases
- Transfer to Human: Escalate to human agents
- API Integration: Call external APIs
- Context Tool: Use context from Context section
- Custom Tools: JavaScript-based custom tools
- Configure tool settings:
- Scope Limiting: Set tags to control when tool is used
- Instructions: Add guidance for tool usage
- Parameters: Configure tool-specific settings
Tool Configuration Options
Scope Limiting (Tag-Based): - Control tool availability based on tags - Example: "Transfer to Human" only for tag needs_escalation
Tool Instructions: - Provide specific guidance on how/when to use the tool - Example: "Use this tool when user asks for order status"
Placeholders: - Configure how data from tools should be used in responses
13. Post Processors
Overview
Post Processors analyze agent responses by sending them to an LLM for evaluation, quality checks, or additional processing. They are configured in Settings > Processors and then added to agents.
 Post Processors configuration
Types of Post Processors
Turn Post Processor:
- Executes after each user-agent exchange (each turn)
- Analyzes individual responses in real-time
Use Cases:
- Sentiment analysis per response
- Compliance checking
- Quality scoring
- Real-time flagging of issues
Conversation Post Processor:
- Executes after the entire conversation ends
- Triggered when conversation is marked as expired (after Conversation Inactivity Duration)
Use Cases:
- Overall conversation summary
- CSAT prediction
- Conversation categorization
- Post-conversation analytics
Configuration
Steps:
- Configure Post Processors in Settings (see Settings > Processors)
- In Agent Builder, navigate to Post Processors section
- Click "Add" to select configured post processors
- Choose processor type:
- Turn Post Processor
- Conversation Post Processor
- Save configuration
Use Case Example
Turn Post Processor: - Check each response for policy violations - Flag responses that may need human review - Real-time quality monitoring
Conversation Post Processor: - Generate conversation summary after chat ends - Predict user satisfaction score - Extract key topics discussed - Create follow-up tasks for human agents
Final Steps
Save Your Agent
 Click Save to finalize your agent configuration
Action: Click "Save" button at the bottom of the page
What this does: - Saves all accordion configurations - Makes the agent available for use - Applies all settings (instructions, models, tools, processors, etc.)
Related Topics
- Agent Reports - Monitor agent performance and analytics
- Agent's Look & Feel - Customize the agent's look and feel to blend and match with your brand
- Cloning an Agent - Duplicate and modify existing agents
- Version Control - Manage agent versions and rollback
- Agent Conversations - View and analyze agent conversations
- Knowledge Overview - Configure knowledge bases for RAG
- Settings > AI Models - Manage available language models
- Settings > Processors - Configure pre/post processors